I believe in testing environments with applications that will be used in the infrastructure itself. Pure synthetic workloads, such as IOmeter, are useful to push hardware to their theoretical limit but that’s about it. Using a real life workload, common to your infrastructure, will give you a better understanding of the performance and behavior of the environment you are testing. However, it can be cumbersome to setup the full application stack to simulate that workload and it might be difficult to simulate future workload.
Simulators made by the application vendor, such as SQLIO Disk Subsystem Benchmark Tool or Exchange Server Jetstress, provide an easy way to test system behaviour and simulate workloads that might be present in the future.
One of my favourite workload simulators is MS Exchange server Jetstress however its not a turn-key solution. After installing Exchange Jetstress you are required to install the ESE binary files from an Exchange server. It can happen that you don’t have the MS exchange installation media available or a live MS exchange system installed.
Microsoft recommends downloading the trail version of Exchange, install the software and then copy the files from its directory. Fortunately you can save a lot of time by skipping these steps and extract the ESE files straight from an Exchange Service Pack. Added bonus, you immediately know you have the latest versions of the files.
I want use Jetstress 2010 and therefor I downloaded Microsoft Exchange Server Jetstress 2010 (64 bit) and Microsoft Exchange Server 2010 Service Pack 3 (SP3).
To extract the files direct from the .exe file, I use 7zip file archiver. ()
The ESE files are located in the following directory:
| File | Path |
| ese.dll | \setup\serverroles\common |
| eseperf.dll | \setup\serverroles\common\perf\amd64 |
| eseperf.hxx | \setup\serverroles\common\perf\amd64 |
| eseperf.ini | \setup\serverroles\common\perf\amd64 |
| eseperf.xml | \setup\serverroles\common\perf\amd64 |
Copy the ESE files into the Exchange Jetstress installation folder. By default, this folder is “C:\Program Files\Exchange Jetstress”.
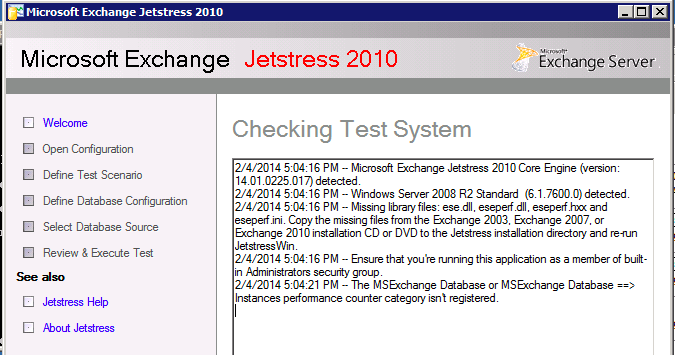
Be aware that you need to run Jetstress as an administrator. Although you might login your system using you local and domain admin account, Jetstress will be kind enough to throw the following error:
The MSExchange Database or MSExchange Database ==> Instrances performance counter category isn’t registered
Just right-click the Jetstress shortcut and select “run as administrator” and you are ready for action.
Happy testing!