Last week I published the article “Saving a Resource Pool Structure” describing the RP-tree backup and restore feature of vSphere 5.1 web client. Multiple people immediately asked if the feature keeps the Managed Object Reference ID (MoRef) of the resource pools identical when it restores the resource pool tree? This is important for vCloud Director as it creates a relationship between vCloud Director objects organization vCD and the vSphere level resource pool. vCloud Director ties the org vCD UUID with the vSphere resource pool Moref id within vCD database. For more information read Chris his post: “Gotcha: Disabling VMware DRS with vCloud Director“.
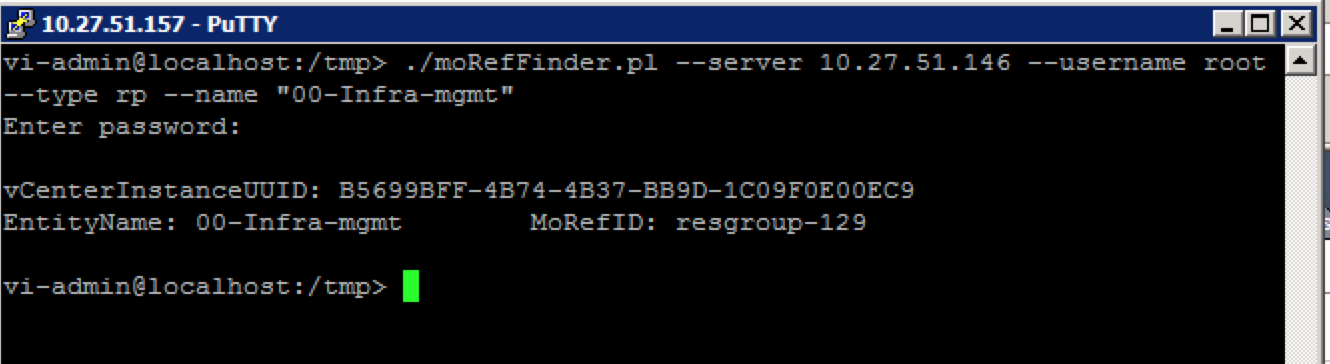
Unfortunately the feature just captures the old tree structure and rebuilds a new tree structure. I tested it by using William Lam’s custom Perl script called moRefFinder.pl. Please visit Williams site to download his script.
Then I proceeded to backup and restore the resource pool tree. vCenter showed the follow commands being processed.

Then I checked if the MoRef ID was the same as prior to disabling DRS.
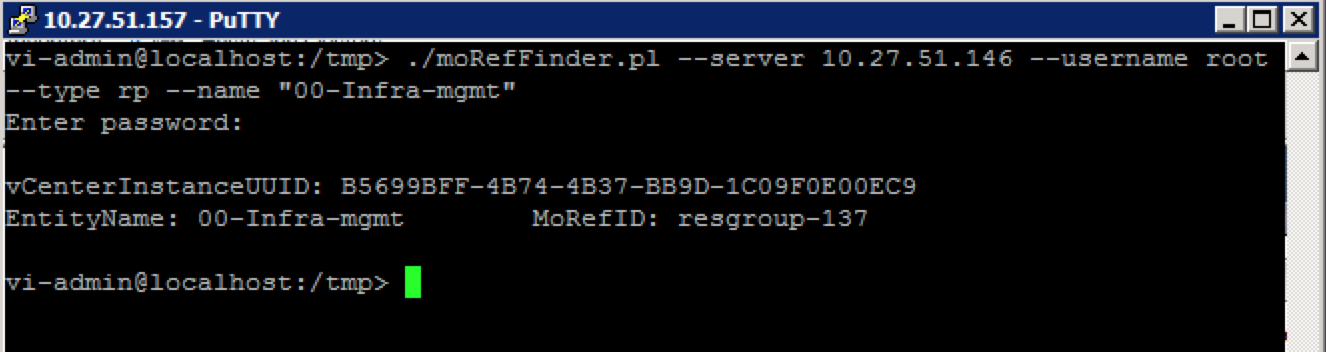
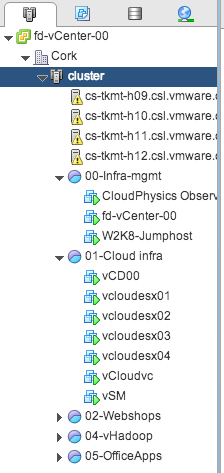
As shown, the current MoRef ID of the “00-Infra-mgmt” resource pool is 137 contrary to MoRef ID of 129 before disabling DRS.
Therefor you should not use this feature when planning to backup and restore the resource pool used by VCD for its organization vCD structures.
Saving a Resource Pool Structure
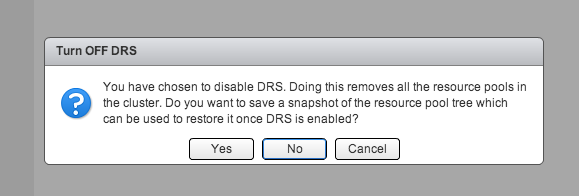
During a troubleshooting exercise of a problem with vCenter I needed to disable DRS to make sure DRS was not the culprit. However a resource pool tree exisited in the infrastructure and I was not looking forward reconfiguring all the resource allocation settings again and documenting which VM belonged to which resource pool. The web client of vSphere 5.1 has a cool feature that helps in these cases. When deactivating DRS (Select cluster, Manage, Settings, Edit, deselect “Turn ON vSphere DRS”) the user interface displays the following question:
Backup resource pool tree
Click “Yes” to backup the tree and select an appropriate destination for the resource pool tree snapshot file. This file uses the name structure clustername.snapshot and should the file size be not bigger than 1 or 2 KB.
Restore resource pool tree
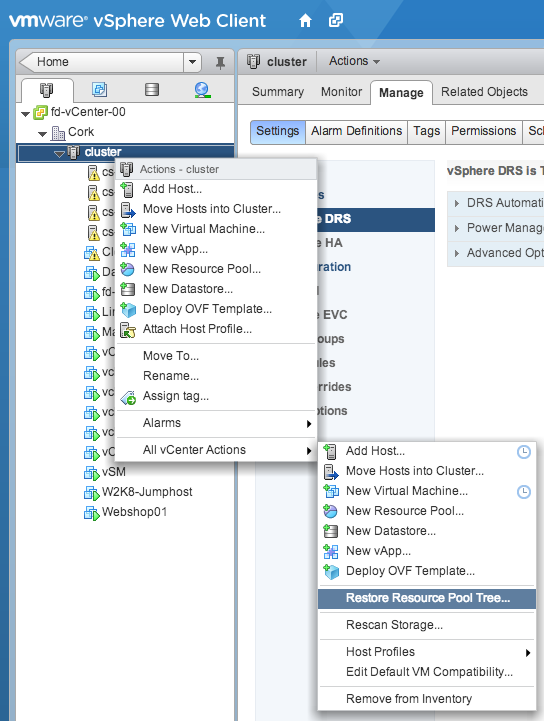
When enabling DRS on the cluster, the User interface does not ask the question to restore the tree. In order to restore the tree, enable DRS first and select the cluster in the tree view. Open the submenu by performing a right-click on the cluster, expand the “All vCenter Actions” and select the option “Restore Resource Pool Tree…”
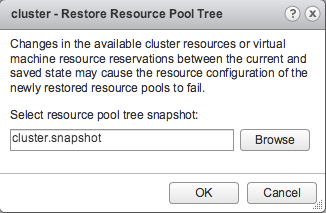
A window appears and click browse in order to select the saved resource pool tree snapshot and click on OK
vCenter restores the tree, the resource pool settings (shares, reservations limits) and moves the virtual machines back to the resource pool they were placed in before disabling DRS.
If you want to save the complete vCenter inventory configuration I suggest you download the fling “InventorySnapshot”.
Update: If you want to use this tool to backup and restore resource pool trees used by vCloud Director, please read this article: Saving a Resource Pool Structure web client feature not suitable for vCD environments
Elastic vDC and how to span a provider vDC across multiple DRS clusters
vCloud director 5.1 provides the ability to create elastic vDC which allows an organization vDC to consume resources from multiple DRS clusters. By having the provider vDC abstract the resources from multiple DRS clusters, its simpler to grow capacity when needed. Before elastic vDC, a new provider vDC and Org vDCs needed to be created when an org vDC wanted to grow beyond the capacity of the provider vDC. With Elastic vDC you just add new clusters when needed and allow the Provider vDC to manage initial placement of vApps.
During research of elastic vDCs I discovered that the way to span a provider vDC isn’t that intuitive. In order to save you some time, here are the steps to create a provider vDC that spans multiple DRS clusters.
Create a Provider vDC, give it a name and select the highest supported hardware version. If you run a homogenous environment with solely 5.1 ESX hosts I highly recommend changing it to Hardware Version 9. If the clusters run different ESX versions, lower the hardware version to the appropriate supported level.
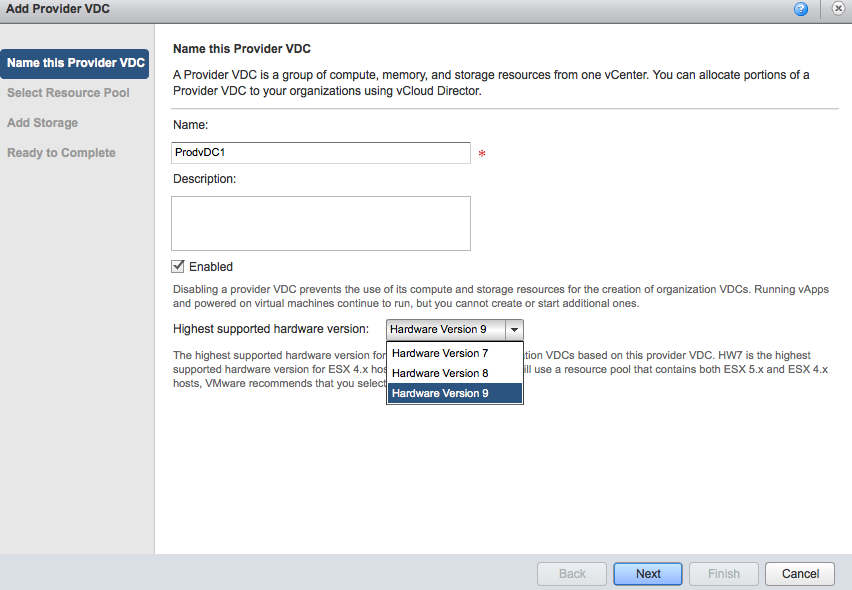
Please note that the provider vDC is responsible for initial placement of the vApp. It will place the vApp on the cluster that contains the most available “unreserved” compute resources and storage resources. It is possible that vApps of the same organization run on different ESX versions.
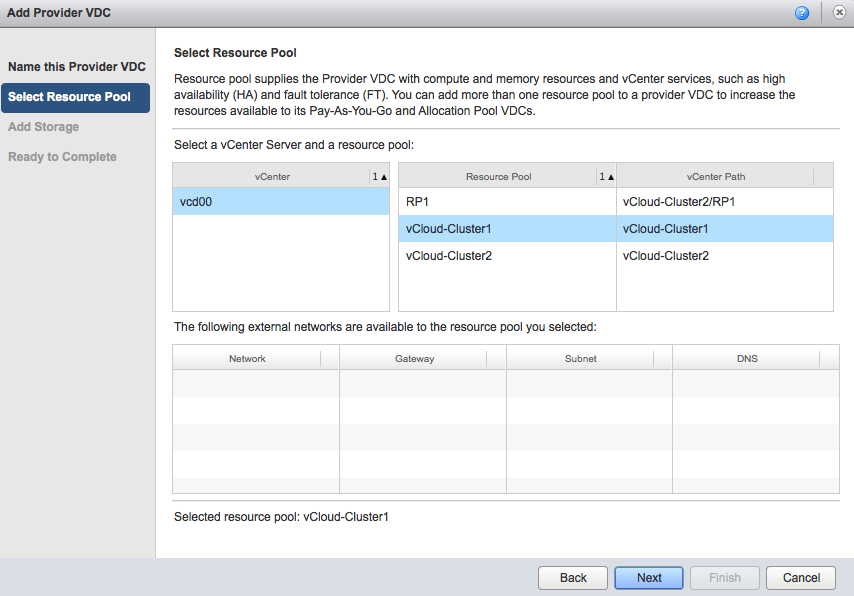
Select Resource pool. This screen is a little bit ambiguous. The user interface “talks” about resource pools, but that doesn’t mean you cannot select a complete DRS cluster for consumption by the provider vDC. A DRS cluster is in essence a resource pool, the root resource pool for all its child resource pools. So don’t worry if you want to select an entire cluster, in matter of fact, when you select the vCenter it shows the DRS clusters as well as the resource pools.
In this example, the vCenter contains two DRS clusters; vCloud-Cluster1 and vCloud-Cluster2. The DRS cluster vCloud-Cluster2 contains a resource pool called RP1. Unfortunately the user interface does not use any icons to differentiate between clusters and resource pools, but shows a vCenter path notation. As RP1 is the child resource pool of vCloud-Cluster2, the vCenter path is as follows: vCloud-Cluster2/RP1.
Unfortunately the interface only allows to select a single resource pool or cluster, therefor I select the vCloud-Cluster1 and select next.
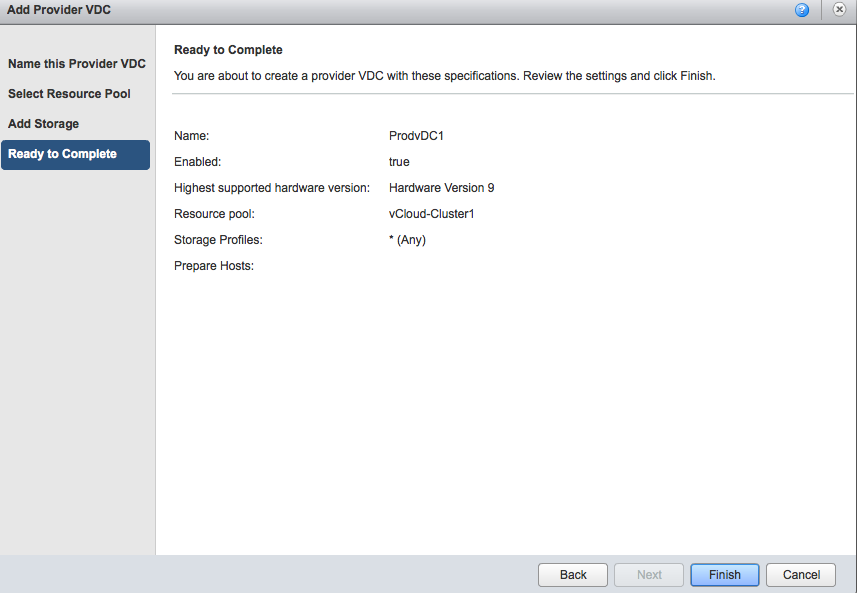
Select an appropriate Storage profile and click on next. The ready to complete screen displays an overview of your selected configuration. Click on Finish to create the Provider vDC.
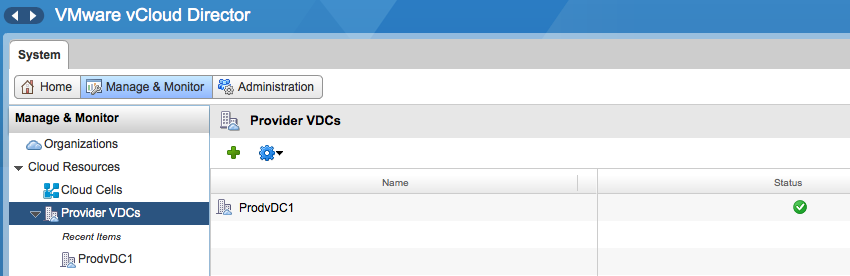
At this point in time, the provider vDC maps to only one DRS cluster. To add additional clusters, go to the Manage and Monitor tab and select Provider vDCs.
Click on the provider vDC and select the resource pools tab
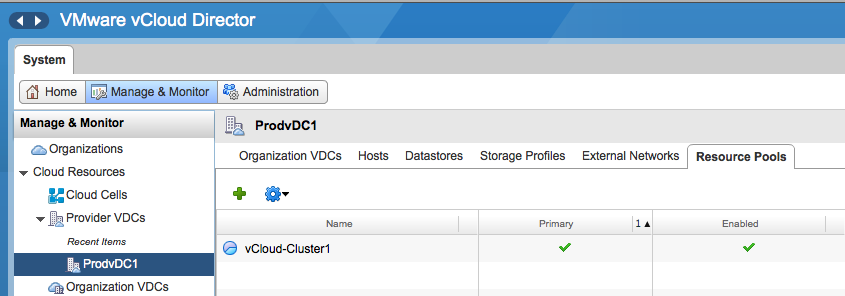
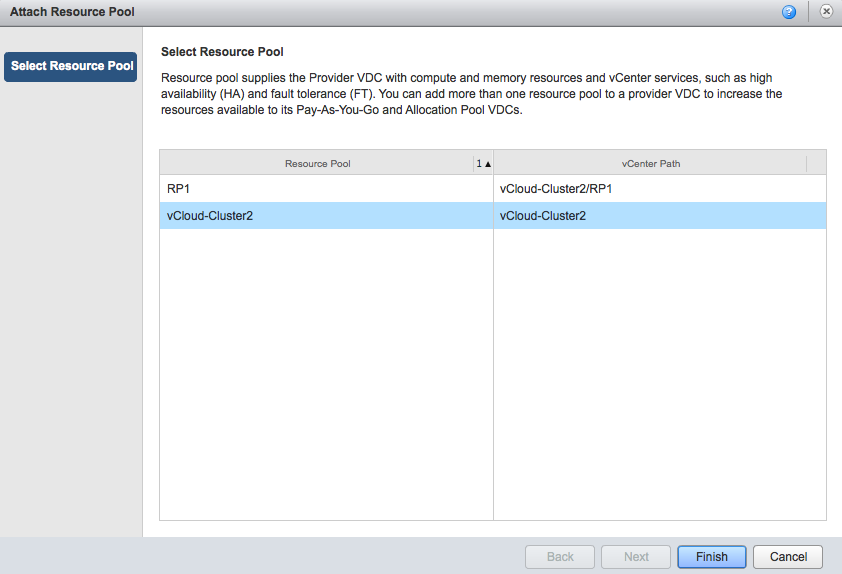
Click on the green plus icon to add another DRS cluster. The attach resource pool window is displayed and you can select another cluster from the same vCenter as the primary cluster. Please note that a provider vDC can only span clusters managed by the same vCenter server. Click on Finish to add the DRS cluster to the provider vDC.
The Provider vDC is now able to provider resources from multiple DRS clusters. In vCloud Director 5.1 both the Pay-as-You-Go and Allocation Pool model org vCD are able to consume resources from an elastic vDC. In order to allow the Allocation Pool model to leverage an Elastic vDC changes needed to be made. Massimo Re Ferrè wrote an extensive post about the changes of the different allocation models in vCloud director 5.1.
Would you be interested in Storage-level reservations?
In todays world it’s quite common to virtualize higher priority / tier-1 applications and services. These applications and services are usually subject to service level agreements that typically include requirements for strong performance guarantees. For the compute resources (CPU and Memory) we are relying on the virtualization layer to give us that resource allocation solution by setting reservation, shares and limits. You might want to ensure that the storage requirements of these virtual machines are met and when contention for storage resources occurs these workloads are not impacted.
Today vSphere offers Storage I/O Control (SIOC) to allocates I/O resources based on the virtual machine priority if datastore latency is exceeded. Shares identify priority while limits restrict the amount of IOPS for a virtual machine. Although these are useful controls it does not provide a method to define a minimum amount of IOPS that is available all the time to the application. Providing lots of shares to these virtual machines can solve help to meet the SLA, however continuously calculating the correct share value in a highly dynamic virtual datacenter is cumbersome and complex job.
Storage level reservations
Therefore we are working on Storage level reservations. A storage reservation allows you to specify a minimum number of IOPS that should be available to the virtual machine at all times. This allows the virtual machine to make minimum progress in order to comply with the service level agreement.
In a relative closed environment such as the compute layer its fairly easy to guarantee a minimum level of resource availability, but when it comes to a shared storage platform new challenges arise. The hypervisor owns the computes resource and distributes it to the virtual machine it’s hosting. In a shared storage environment we are dealing with multiple layers of infrastructure, each susceptible to congestion and contention. And then there is the possibility of multiple external storage resource consumers such as non-virtualized workloads using the same array impacting the availability of resources and the control of distributing the resources. These challenges must be taken into account when developing storage reservations and we must understand how stringent you want the guarantee to be.
One of the questions we are dealing with is whether you would like a strict admission control or a relaxed admission control. With strict admission control, a virtual machine power-on operation is denied when vSphere cannot guarantee the storage reservation (similar to compute reservations). Relaxed admission control turns storage reservations into a share-like construct, defining relative priority at times where not enough IOPS are available at power-on. For example: Storage reservation on VM1 = 800 and VM2 = 200. At boot 600 IOPS are available; therefore VM1 gets 80% of 600 = 480, while VM2 gets 20%, i.e. 120 IOPS. When the array is able to provide more IOPS the correct number of IOPS are distributed to the virtual machines in order to to satisfy the storage reservation.
In order to decide which features to include and define the behavior of storage reservation we are very interested in your opinion. We have created a short list of questions and by answering you can help us define our priorities during the development process. I intentionally kept the question to a minimum so that it would not take more than 5 minutes of your time to complete the survey.
Disclaimer
As always, this article provides information about a feature that is currently under development. This means this feature is subject to change and nor VMware nor I in no way promises to deliver on any features mentioned in this article or survey.
Any other ideas about storage reservations? Please leave a comment below.
The survey is closed, thanks for your interest in participating
Hello world! Again
During my holiday, frankdenneman.nl got some unwanted attention.
I’m currently in the process of rebuilding the site.
Stay tuned for new updates!