I need to install Windows 11 on a gaming PC, but I only have a MacBook in my house, as this is my primary machine for work. To make things worse, trying to do this on macOS Monterey is extra difficult due to the heightened security levels that withhold you from running unsigned software. I.e., most free tooling software. However, most tooling is provided by macOS itself. You have to remember the correct steps. And because this is not a process I often do, I decided to document it for easy retrieval, which might help others facing the same challenge.
As I mentioned, most of the tools are installed on macOS. The only missing one is the open-source Windows Imaging Library (wimlib). This tool helps you to split a particular file (install.wim) as it is too large for the filesystem we use on the USB drive. To install wimlib, you need to have Homebrew installed. Homebrew is a package manager for macOS. Some already have it installed, and some don’t, so I will include the install command for Homebrew.
Install Homebrew
Open a terminal window and run the following command:
/bin/bash -c "$(curl -fsSL https://raw.githubusercontent.com/Homebrew/install/HEAD/install.sh)"This can be a lengthy process. My recent model Macbook Pro took about 6 minutes to complete.
To Install wimlib, run the following command:
brew install wimlibInsert a USB key that is large enough to contain Windows 11. I use a 64GB USB drive that can also store extra drivers. Newer motherboards are typically equipped with these Intel 2.5 GbE NICs, and Windows 11 do not have the driver built-in. If you want to store these drivers on the USB drive as well to be able to continue the Windows install process.
To discover which disk identifier macOS assigned to the USB driver, run the following command:
diskutil list external
The option “external” only displays mounted volumes. This helps you to spot your USB drive easily. In my case, macOS assigned the identifier “disk5” to it. Note the disk name. We need that for our erasedisk command.
Erase the USB Drive
The next command is going to erase the USB drive using MS-DOS format. Use a Master Boot Record scheme (MBR) as this is necessary to find all the files during the installation of Windows 11. We need to retain the disk’s name and use the identifier. The name is 64GBUSB, and the identifier is disk5
diskutil eraseDisk MS-DOS "64GBUSB" MBR disk5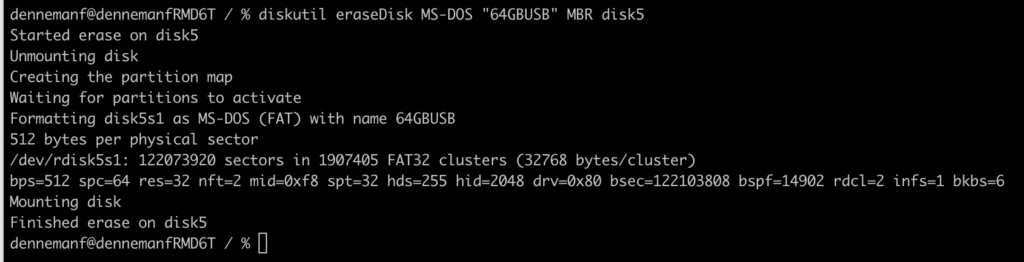
Mount Windows 11 ISO
The next step is to mount the Windows 11 ISO, you can use finder for that and click on the file, but as we are doing everything in the terminal, the command you can use to mount the iso is:
hdiutil mount Win11_22H2_English_x64v1.isoI’ve executed this command in the directory in which the ISO file was stored. You can execute this command anywhere but ensure to include the full path to the Windows 11 ISO file.
The main challenge of creating the Windows 11 bootable USB drive is the install size.wim file in combination with the MS-DOS format of the drive itself. The install.wim file is larger than 4GB and thus incompatible with the file system. To solve that, you can compress or split the file using wimlib. The Windows installation process knows how to deal with split files; thus, this is the preferred method, as compressing files impacts the duration of the installation process.
Copy files Windows ISO to USB Drive
The first step is to copy over all the files of the Windows 11 ISO file that we just mounted EXCEPT the install.wim. The easiest way is using the following rsync command:
rsync -avh --progress --exclude=sources/install.wim /Volumes/CCCOMA_X64FRE_EN-US_DV9/ /Volumes/64GBUSB
The progress option shows each file’s copy progress; the first volume is the source (the windows ISO), and the second volume directory is the destination (the USB drive). The exclude option tells rsync to ignore install.vim during the copy process.
Split Install.wim
The last step is to split the install.wim into two parts and place it into the sources folder onto the USB drive. To do so, execute the following command:
wimlib-imagex split /Volumes/CCCOMA_X64FRE_EN-US_DV9/sources/install.wim /Volumes/64GBUSB/sources/install.swm 4000The key element of this command is the option “4000” this tells the command to split the file into chunks with a maximum size of 4000 MB. The MS-DOS (fat32) maximum file size is 4096MB. You can decide to lower the number if you’re comfortable, but keep it a little bit under the max.

Once this process is complete, you’re done. You can safely unmount the USB drive and use it to install Windows 11.
diskutil unmount /dev/disk5

Great post. You can also use Ventoy to create a bootable USB, on which you can directly put any ISO.
Worked perfectly! Just had to update my bios setting to remove RAID on my hard drive.
Great post indeed, but I’m not sure why you’ve written `winlib` 3 times instead of `wimlib`, especially in the code snippet to install it with brew. When you try to run the command to split the file, obviously, you get a “-bash: wimlib-imagex: command not found”.
Also, I’m not sure if I missed any steps, but once you have the right lib installed and you try to run the command again, another error comes up: “No such file or directory”. The path you suggest for the destination (/Volumes//sources/install.swm) doesn’t exist, you need to add the ISO volume name to it, as in “/Volumes//CCCOMA_X64FRE_EN-GB_DV9/sources/install.swm”.
Something in this blog’s processing doesn’t allow me to use angled brackets (some HTML sanitizing, I assume). Where I typed “/Volumes//sources/install.swm” and “/Volumes//CCCOMA_X64FRE_EN-GB_DV9/sources/install.swm” (notice the double forward slashes), there should be a “[drivename]” between the double slashes.
yeah, in the writeup the drive name is called 64GBUSB
Btw this is one command:
wimlib-imagex split /Volumes/CCCOMA_X64FRE_EN-US_DV9/sources/install.wim /Volumes/64GBUSB/sources/install.swm 4000
I appreciate the reply, but I was actually referring to my comment. On my first comment, the blog formatting removed the text “[drive name]” (with angled brackets instead of square brackets) from the paths that I typed, so it looks like I’m mentioning paths that don’t have that part in them, which would obviously be a mistake.
Just as an update for future readers, I mentioned the “No such file or directory” error when trying to split the file. When running the `rsync` command, the destination folder structure does not contain the path “/Volumes/[drive name]/sources”, it actually contains “/Volumes/[drive name]/[ISO name]/sources”, which makes the `wimlib-imagex` command throw the aforementioned error. I noticed that in the code snippet for the `rsync` command, the source path has a trailing slash, whereas the screenshot below it doesn’t have it. I wonder if that’s what causes the difference in the path (I did it without the trailing slash). In any case, if that does happen to someone, know that the USB Drive won’t boot. You’ll need to move all the contents that are inside of the “[ISO name]” folder out onto the root of the USB drive.
Thanks for fixing the “winlib” typo, by the way!
@Luca, thanks a ton for the wisdom about the trailing slash leading to an erroneously nested folder. I noticed it being nested when the split command errored out, and wondered if it would still work when booting–good to know I’ll need to move everything up a directory once the split is done (currently waiting on that). Appreciate you taking the time to explain this!
@ frankdenneman thank you for this stellar post!
Couldn’t you use the exFAT format and skip the splitting part?
Never tried it. Let me know how it works
I tired it with ExFAT, and the BIOS could not boot from the USB. Using MS-DOS it was able to boot. Maybe I just had bad luck, or it was due to older hardware. Buyer beware!
Also, is the ” install.vim” an easter egg (for us avid vim users), or a typo?
How much time it takes to split the install.wim? I waited about 30 minutes on my M2 MacBook Air and it is still in processing (no progress bar). Then I googled the topic and tried UUByte ISO Editor, which only took 10 minutes to do the splitting.
did you have to pay for uubyte? it kept telling me trial but i couldn’t do anything in the trial.
A few notes for those who might need them:
– after installing homebrew run the command from the “Next steps” section
(echo; echo ‘eval “$(/opt/homebrew/bin/brew shellenv)”‘) >> /Users/macsx/.zprofile
eval “$(/opt/homebrew/bin/brew shellenv)”
– Change the drive name for command in “Erase the USB” (Author’s USB is “64GBUSB”, put yours)
– ISO will be named “Win11_22H2_EnglishInternational_x64v1.iso” for non US-English
– If you’re using non US-English it will be EN-GB not EN-US in the name of the mounted ISO
– Change mounted ISO name in commands for section “Copy files Windows ISO to USB Drive” and “Split Install.wim” if using non US-English
Thank you for the install instructions Frank!
After installing homebrew run the command from the “Next steps” section in terminal. If you are copying mine you will need to change the username to your own (mine is macsx). Thanks.
Worked like a charm
I followed all the steps of this article. It went through with a breeze! Ofcourse, all the drive-identifiers and the ISO-language specific identifiers had to be adjusted in the commands, but with a bit of common sense, any computer savvy bloke can do that.
Yes, the splitting of the install.wim can be a lengthy process in terminal. And yes, sometimes it takes up to 2 hours. But it really is the best way to do so. Any other splitting-method always has resulted in errors on the computer I tried to install windows on. (I’m building bootable media on MacOs since Windows 7 already. Though I don’t remember all the steps due to infrequent uses, I always have to look up the steps in articles like these).
Thank you Frank, for a very clear and straight forward tutorial!
Thank you very much. You’re the man!
Hi,
It is a great info. However, when I tried to install from the USB I’ve created using the above instructions, the process asks for the disk 2 ;-( Apparently, something was not right?
Any comments?
Hi Rasit, do you know if the process successfully split install.wim?
Fast fingers… 😉 I suspect that I named the splits with wim extension ;-(
great post. I have been struggling to get the windows installed and I had only MacBook to create bootable USB drive. it worked like a magic the third time… I had to tweak the Bios settings and then boom. thank you so much Frank. you are a genius. saved my day and can go to sleep restful.appreciate you time and effort and cause to help out people like me.
Great Job, I had follow this and it work great, just changing names of volumes as you do etc. all work fantastic at once.
Thank you
Give this man a medal. I swear no one on the internet actually gave the right commands that worked throughout the process. Good job.
Thanks a lot for writing this up. I didn’t have to install Windows for many years and this saved me a lot of time!
You do not know how much I appreciate this walk-through. Thank you.