• Skip to primary navigation
  • Skip to main content

frankdenneman.nl

  • AI/ML
  • NUMA
  • About Me
  • Privacy Policy

Home Lab Fundamentals: Time Sync

June 3, 2016 by frankdenneman

First rule of Home Lab club, don’t talk about time sync! Or so it seems. When starting your home lab, all hints and tips are welcome. The community is full of wisdom, however sometimes certain topics are taken for granted or are perceived as common knowledge. The Home Lab fundamentals series focusses on these subjects, helping you how to avoid the most common pitfalls that provide headaches and waste incredible amounts of time. A ‘time-consuming’ pitfall is dealing with improper time synchronization between the various components in your lab environment.
Most often, the need for time synchronization is seen as an Enterprise requirement but not really necessary for lab environments. Maybe because most think time synchronization is solely necessary for troubleshooting purposes. In some cases, this is true as ensuring correct time notation allows for proper correlation of events. Interestingly enough, this alone should be enough reason to maintain synchronized clocks throughout your lab, but most home labs are just rebuilt when troubleshooting becomes too time-consuming. However time sync is much more expedite troubleshooting and ignoring time drift is a straight path into the rabbit hole. Time synchronization utilities such as NTP are necessary to correct time drift introduced by hardware time drift and guest operating system timekeeping imprecision. When time differs between systems to much it can lead to installation and authentication errors. Unfortunately, time issues are not always easily identifiable, to provide a great example;

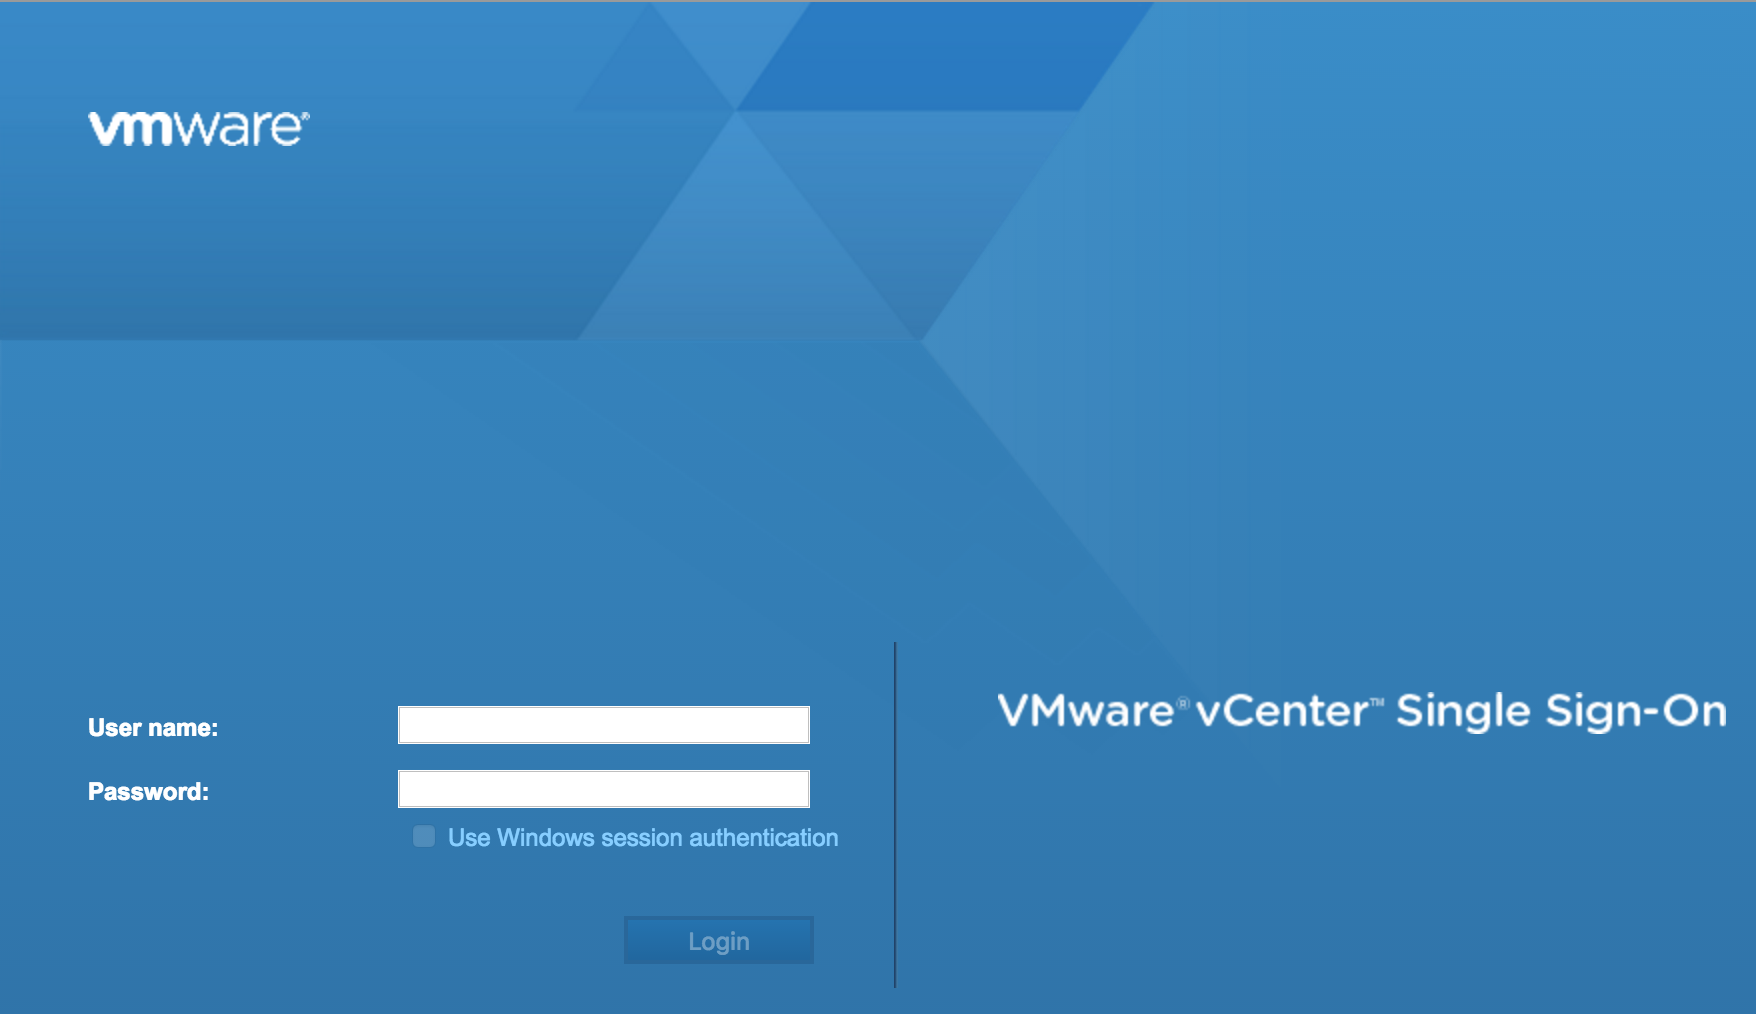
“[400] An error occurred while sending an authentication request to the vCenter Single Sign-On server – An error occurred when processing the metadata during vCenter Single Sign-On setup – null.”

This particular issue occurs due to a time skew between the vCenter Server Appliance 6.0 and the external Platform Service Controller. Here are just a few other examples of what can go wrong in your lab due to time skew issues;

  • Adding a host in vCenter Server fails with the error: Failed to configure the VIM account on the host (1029863) Time skew between ESXi host hardware clock and vCenter Server system time. https://kb.vmware.com/kb/1029863
  • After joining the Virtual Center Server Appliance to a domain you cannot see domain when adding user permissions (2011965): This issue occurs when the time skew between the Virtual Center Server Appliance(VCSA) and a related Domain Controller is greater than 5 minutes. https://kb.vmware.com/kb/2011965
  • Cluster level performance graphs show the most recent value as 0: This metric is susceptible to clock skew between the vSphere Client, vCenter Server, and ESX hosts. If any of the hosts have a skewed clock, the entire cluster shows as 0. https://kb.vmware.com/kb/2009550
  • The vCenter Server Appliance installation fails when connecting to an External Platform Services Controller: This issue occurs when the system time on the system hosting the PSC does not match the time of the system where vCenter Server is installed. https://kb.vmware.com/kb/2128811
  • Configuring the NSX SSO Lookup Service fails (2102041): Connectivity issues between the NSX Manager to vCenter Server due to time skew between NSX Manager and vCenter Server. https://kb.vmware.com/kb/2102041
  • Authentication Errors are Caused by Unsynchronized Clocks: If there is too great a time difference between the KDC and a client requesting tickets, the KDC cannot determine whether the request is legitimate or a replay. Therefore, it is vital that the time on all of the computers on a network be synchronized in order for Kerberos authentication to function properly. https://technet.microsoft.com/en-us/library/cc780011(v=ws.10).aspx

Timekeeping best practices by VMware
Simply put, when weird behavior during setup or authentication occurs, check the time between the various components first. VMware released multiple knowledge Base articles and technical documents that contain detailed information and instructions on timekeeping within the various components of the virtual datacenter:

  • Timekeeping in Vmware virtual Machines: http://www.vmware.com/files/pdf/Timekeeping-In-VirtualMachines.pdf
  • Timekeeping best practices for Windows, including NTP (1318): https://kb.vmware.com/kb/1318
  • Timekeeping best practices for Linux guests (1006427): https://kb.vmware.com/kb/1006427
  • ESX and ESXi host time keeping Best Practices: https://kb.vmware.com/kb/2004453

VMware doesn’t provide a separate time keeping best practices document for vCenter, but provides multiple guidelines in the vCenter Server Appliance configuration guide. When installing vCenter on a Windows machine it’s recommended to sync to the PDC emulator within the Active Directory domain. In general, VMware recommends to use native time synchronization software, such as Network Time Protocol (NTP) with the various vSphere components. NTP is typically more accurate than VMware Tools periodic time synchronization and is therefore preferred.
Time synchronization design
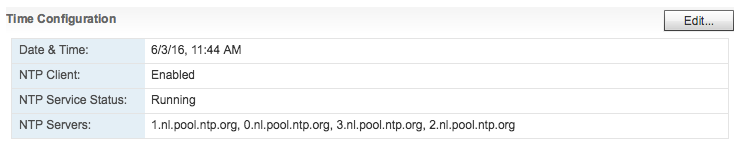
There are multiple schools of thoughts when it comes to time sync in a virtual data center. One of the most common ones is to synchronize the virtual datacenter infrastructure components such as ESXi hosts and the VCSA to a collection of external NTP server. Typically provided by http://www.pool.ntp.org/en/ or the US Naval observatory: http://tycho.usno.navy.mil/NTP/. Windows virtual machines sync their time to the Active Directory domain controller running the PDC emulator FSMO role: Time Synchronization in Active Directory Forests http://social.technet.microsoft.com/wiki/contents/articles/18573.time-synchronization-in-active-directory-forests.aspx It’s recommended to point the ESXi hosts to the same time source as the PDC emulator of the active directory. When running Linux best practice is to sync these systems with an NTP server.
Another widely adopted design is to sync ESX servers to the to the Active Directory domain controller running the PDC emulator FSMO role. VCSA time keeping configuration provide two valid options; NTP and hosts. In this scenario, select the host option to ensure time between the host and VCSA is in sync. If the VCSA is using a different time source other than the ESX host, a race condition can occur between time sync operations and can lead to failing the vpxd.
01-VMware vCenter Server 6.0 Update 2 Release Notes
Source: VMware vCenter Server 6.0 Update 1b Release Notes: http://pubs.vmware.com/Release_Notes/en/vsphere/60/vsphere-vcenter-server-60u1b-release-notes.html
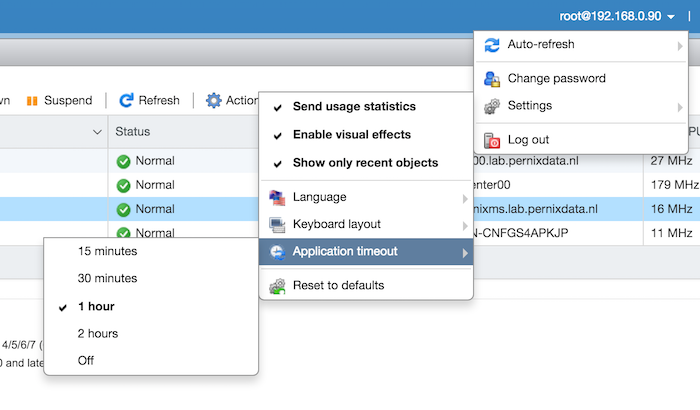
But the most interesting thing I witnessed that can easily become a wild-goose chase is the VM tools time synchronization when time on an ESXi host is incorrect. As described earlier, enabling VMware tools time sync on virtual machines was a best practice for a long time. Shifting towards native time synchronization software led VMware to disable the periodic time synchronization option by default. The keyword in the last sentence is PERIODIC. By default VMware tools synchronizes time with the host during the following options:

  • Resuming a suspended virtual machine
  • Migrating a virtual machine using vMotion
  • Taking a snapshot
  • Restoring a snapshot
  • Shrinking the virtual disk
  • Restarting the VMware tools service inside the VM
  • Rebooting the virtual machine

The time synchronization checkbox controls only whether time is periodically resynchronized while the virtual machine is running. Even if this box is unselected, by default VMware Tools synchronizes the virtual machine’s time to the ESXi host clock after the listed events. If the ESXi host time is incorrect it is likely that “unexplainable” errors will occur. I experienced this behavior after migrating a VM with vMotion. I couldn’t log on to a windows server as the time skew prevented me from authenticating.
You can either disable these options by adding rules to the VMX file of each VM or just ensure that the ESXi host is syncing the time with a proper external time source. For more information: Disabling Time Synchronization (1189) https://kb.vmware.com/kb/1189.
No time zone for ESXi
Be aware that as of vSphere 4.1 ESXi hosts are set to Universal Time Coordinated (UTC) time. UTC is interesting as its the successor of Greenwich Mean Time (GMT) but UTC itself is not a time zone, but a time standard. There are plenty of articles about UTC, but the key thing to understand is that it never observes Daylight Saving Time. As UTC is not a time zone, you cannot change the time notation in ESXi itself. The vSphere client, web client and HTML5 client automatically display the time in your local time zone and will take into account the UTC setting on the host. This isn’t bad behavior, just be aware of this so you don’t freak out when you check the time via the command line.
02-date-esxi-command-line
03-Webclient NTP
CMOS clock
ESXi synchronizes its system time with the hardware clock (CMOS/BIOS/ACPI)of the server if the NTP service is not running on the ESXi host. SuperMicro boards allow for NTP synchronization, but most home lab motherboards just provide the time as being configured in the BIOS. When the NTP daemon is started on the ESXi host it synchronizes its system time to the external time source AND it updates the hardware clock as well. I ran a test to verify this behavior. At the time of testing it was 12:37 (GMT+1 | UTC 10:37), NTP turned off and set the time in the BIOS to 6:37 UTC time. After booting the machine the command esxcli system time get confirmed ESX system time retrieved the time from the hardware clock. After starting the NTP Services, the system time was set to the correct time: 10:37.The command esxcli hardware clock get demonstrated that NTP also corrected the BIOS time. A quick BIOS check confirmed esxcli hardware clock get was displaying the BIOS configuration.
04-Insert esxcli screenshot
If your lab is not connected to the internet, confirm the BIOS time with the command esxcli hardware clock get and if necessary use the command esxcli hardware clock set -d (Day) -H (Hour) -m (Minute) -M (Month) -s (Second) -y (Year) to set the correct time.
Please note that ESXCLI reports time with the Z (Zulu) notation, this is the military name for UTC.
Raspberry Pi as a Stratum-1 NTP Server
When having a home lab, you usually face the age old dilemma common sense vs ‘exciting new stuff that you might not need but you would like to have’. You can update your CMOS clock manually or scripted, you can connect to an array of external NTP servers or you can build your own Stratum-1 NTP server using a Raspberry PI with a GPS add-on board .
Up next in this series:Home Lab fundamentals: Reverse DNS

Filed Under: Home Lab, VMware

ntpq -p connection refused error message

May 30, 2016 by frankdenneman

Sometimes a small misconfiguration can cause havoc in a complex distributed system. It becomes really annoying when no proper output is provided by log files and status report. While investigating time issues in my lab I ran into the following error message while executing the ntpq -p command:
01-ntpq-p connection refused
TL;DR
NTP client is disabled, enable it via the GUI
The standard NTP query program (ntpq) is one of the quickest way to verify that the Network Time Protocol Daemon (ntpd) is up and running. The command ntpq -p prints a list of peers known to the ESXi host as well as a summary of their state. Running the command on another ESXi host provided the following output.
02-ntpq -p feedback
Requesting the status of the NTPD status on the host with weird time issues, shows it’s not running. No proper feedback is provided by the command line other than it’s starting, no failure code is returned.
03.NTPD status
Management service initialisation, such as ntpd starts are logged in the file /var/log/syslog.log in ESXi 5.1 and up. Unfortunately, nothing useful is logged in this logfile as well.
04.syslog.log output
I couldn’t find a command that provides accurate output whether the NTP client was enabled or not. Time to open up the web client. Host time configuration can be found when selecting the ESXi host, Manage, Time Configuration. Apparently NTP was not enabled.
05-NTP client disabled
Simple problem to fix, unfortunately there is no simple command line function that allows to verify while NTP client is enabled (sans PowerCli)

Filed Under: VMware

No network connection after re-registering VCSA using the I've copied it answer

May 24, 2016 by frankdenneman

Paulo Coelho once stated “Life moves very fast. It rushes from Heaven to Hell in a matter of seconds” Well I think he perfectly described a day working in the lab and rushing through a migration. I’m upgrading the lab and I moved the vCenter Server Appliance (VCSA) to its new home. While trying to do a million things all at once, I didn’t pay attention to the question whether I moved the virtual machine or whether I copied it. I selected the option “I copied it”. And that’s when the fun started, vCenter down.
TL;DR:
Selecting “I copied it” implies that this machine is a duplicate and that a new identity should be generated. This means that the VM is getting a new UUID and a new MAC address. SUSE Linux Enterprise Server 11 detects this new MAC address and views this as a new Ethernet Device. The VCSA does not allow the creation of a new ethernet controller. Rename 70-persistent-net.rules file and reboot to have SUSE auto-generate a new 70-persistent-net.rules file with the correct MAC Address that allows you restore network connectivity via the console.
Troubleshooting the problem
Both the web client and the VCSA config web page are unreachable, time to open up the VM console (Alt-F1). When logging in and pinging the gateway the error, the system returns the error message “Network is unreachable”
01-VCSA network is unreachable
Before tinkering with the configuration files, I like to restart the services and see if the status report exposes interesting information.
02-VCSA service network restart
“No configuration found for eth1”. The VCSA is configured with a single NIC and SUSE Linux Enterprise Server 11, which is the OS for the appliance, assigns the label eth0 to the first Ethernet adapter. VCSA networking is configured through the Virtual Appliance Management Interface (VAMI). Executing the command “/opt/vmware/share/vami/vami_config_net allows you to retrieve the current network configuration
03-VCSA vami_config_net
When selecting option 6 “IP Address Allocation for eth1” VAMI reveals that it cannot read the interface files for ‘eth1’
04-VCSA-IP_address-Alloc_for_Eth1
The networking interface files are stored in the directory /etc/sysconfig/networking/devices. When listing the files (ls) only ifcfg-eth0 shows up. Reviewing the ifcfg-eth0 file with cat shows that the correct networking configuration is still applied to eth0.
05-VCSA-ifcfg-eth0 results
It looks like the problem occurs due to the way SUSE handles devices. The following text is copied directly from the SUSE documentation:

When the Kernel detects a network card and creates a corresponding network interface, it assigns the device a name depending on the order of device discovery, or order of the loading of the Kernel modules. The default Kernel device names are only predictable in very simple or tightly controlled hardware environments. Systems which allow adding or removing hardware during runtime or support automatic configuration of devices cannot expect stable network device names assigned by the Kernel across reboots.
However, all system configuration tools rely on persistent interface names. This problem is solved by udev. The udev persistent net generator (/lib/udev/rules.d/75-persistent-net-generator.rules) generates a rule matching the hardware (using its hardware address by default) and assigns a persistently unique interface for the hardware. The udev database of network interfaces is stored in the file/etc/udev/rules.d/70-persistent-net.rules. Every line in the file describes one network interface and specifies its persistent name

Source: https://www.suse.com/documentation/sled11/book_sle_admin/data/sec_basicnet_manconf.html
When the ESXi host assigns the VM a new MAC Address, SUSE assigns a new unique interface to this MAC address and stores this in the file etc/udev/rules.d/70-persistent-net.rules.
06-VCSA-70-persistent-net_rules
It shows two Ethernet adapters, eth1 is using the MAC address currently assigned to the VM.
07-VCSA-VM network-configuration
We are now entering a twilight zone, where there is one ethernet interface configured with an IP-address (ifcfg-eth0) while SUSE is applying all rules to a device it created and using the MAC Address assigned to the only NIC attached to the VM (Network Adapter 1). Time to clean up. Luckily udev rules are automatically generated during boot. To solve the mac address assignment fast, rename the file 70-persistent-net.rules
08-VCSA-rename udev file
After rebooting the VCSA, review the 70-persistent-net.rules file to verify that SUSE assigned the MAC address to eth0.
09-VCSA-clean udev rule
You can now safely customize the system (Press F2 in the console) and configure the management network
10-VCSA-configure management network
A reboot of the VCSA is necessary as it appears that a restart of the management services is not enough to restore all services. Funny how times change, nowadays you get really happy seeing a blue screen.
11-VCSA-weblogin

Filed Under: VMware

Adjust timeout value ESXi Embedded Host Client

April 12, 2016 by frankdenneman

I love to use the ESXi Embedded Host Client next to vCenter in my lab. It’s quick, it provide most of the functionality and best of it all it has a functioning VM console when accessing it from a MAC. The ESXi Embedded Host Client time-out default is set to 15 minutes, but you can adjust this setting.
Time-out ESXI embedded client
On the right side of the menu bar there is a drop down menu next to the IP-address or DNS name of your ESXi server. Open it and go to:

  1. Settings
  2. Application timeout
  3. Select the appropriate timeout value

As I use it in my lab, I select the option off, but if you use this in other environments I can expect you use a different value.

Filed Under: VMware

DVD Store, the perfect homelab workload tool

March 31, 2016 by frankdenneman

DVD Store 2.1, a magnificent tool for all aspiring VCP/VCAP candidates. A great tool for home lab enthousiasts to understand performance metrics, a fantastic tool to understand the behavior of an application stack in a virtual datacenter.
WHAT IS DVD STORE?
According to the official site the DVD Store Version 2.1 (DS2) is a complete open source online e-commerce test application, with a backend database component, a web application layer, and driver programs. The goal in designing the database component as well as the midtier application was to utilize many advanced database features (transactions, stored procedures, triggers, referential integrity) while keeping the database easy to install and understand. The DS2 workload may be used to test databases or as a stress tool for any purpose.
Thanks Todd Muirhead and Dave Jaffe for creating this! However there is a slight challenge in installing it properly. You can install it on windows or on Linux and use many different database programs. I like to use windows for this. Unfortunately I tried to follow the instruction video on youtube and it was lacking some crucial details to get it deployed successfully. Therefor I started to document the steps involved to get it deployed on a Windows 2012 system using SQL 2014 SP1. Please note that you can run DVD store on Linux as well, and it might be even better (more lean and mean than a windows install) for homelabs. If you have a detailed write-up (100% reproducible) of a working deployment DVD store on Linux, please share the link to your article in the comments.


DVDSTORE ARCHITECTURE
As described above the DVD Store is an application stack that can run on a single or multiple virtual machines. By using multiple virtual machines, you can test various components and layers in your virtual datacenter. As this is my goal I’m creating a VM that will run the database and another VM that generates the workload.
00-DVDStore architecture
Requirements
I’m listing the software I’ve used in order to create a working environment. Many variations are possible. If you can create a lightweight version of this build, or a complete community edition (license free) please share URL of your article in the comments.

  • Two virtual machines
  • Windows 2008 R2 and Windows 2012
  • Windows 2008 R2 SP1
  • DVD Store 2.1 ds21.tar.gz
  • DVD Store 2.1 ds21_sqlserver.tar.gz
  • Winzip
  • SQL 2014 SP1*
  • ActiveState ActivePerl Community Edition

DATABASE VM
In this exercise I’m going to install and configure a 20GB database on a Windows 2012 VM. If you are using templates, check if you have enough space for the DVD store on your C-drive. During the first stage the temporary files will be stored on the C: drive, provide enough space which is at least equal to the DB size. The database hard disk needs to be twice the size of the DB in order to successfully import the data. Post configuration optimizations can reduce the consumed space of the database, but don’t be too frugal when configuring the hard disks. Play around with the compute settings depending on your lab equipment. I noticed that Windows 2012 uses 5.4 GB of memory to run its OS and SQL Express when idling, but during installation it consumed close to 11GB.
Windows 2012 configuration
Update Windows 2012 with all the latest patches and update VMtools, enable remote desktop if you don’t want to use the VM console. Disable the firewall, as this I run an air-gapped lab I don’t want to spend too much time on firewall rules. SQL requires to Enable Microsoft .Net Framework 3.5 SP1. and Download and install Microsoft .Net Framework 4.0. .Net Framework 4.0 is already a part of the Windows 2012 OS, therefore you only have to enable 3.5. by executing the following steps:

  1. Go to Server Manager
  2. Add roles and features
  3. Next
  4. Role-based or feature-based installation
  5. Click Next until you reach Features
  6. Select .Net Framework 3.5 Features
  7. Click Install

Extracting DVD Store
The DVD Store kit is available at linux.dell.com/dvdstore. Download the file ds21.tar.gz and ds21_sqlserver.tar.gz. Both include scripts that are made on a unix based machine, missing the proper CR/LF format for a windows system. Winzip converts files to proper windows format while extracting, therefor I recommend using Winzip. Alternatively you can use a tool such as Unix2Dos to convert the files if you don’t want to use Winzip. Extract both files to the C:\ Drive creating a directory structure as follows:
01-Ds21 directory structure
Install ActivePerl
The installation of DVD Store is done via a Perl script, Windows 2012 doesn’t contain a Perl utility. One of the recommended Perl Utility is ActiveState ActivePerl Community Edition. You can download it here. As I’m using Windows 2012, I need to download the x64 MSI version. The install is straightforward, no specific options need to be selected, basically a next next finish install.


SQL 2014
DVD store can leverage both the full version or the Express version of SQL. Microsoft allows you to evaluate their products 180 days. If you do maintain a VM configuration for more than 180 days you can use the free version of SQL 2014 express. Please be aware that you need SQL Server Express with Advanced Services as it includes the full version of SQL Server 2014 Management Studio and Full Text Search and Reporting Service. Both features are required to run DVD Store. For more info on SQL 2014 versions go here: https://www.microsoft.com/en-us/download/details.aspx?id=42299. Download SQL 2014 Express ADV SP1 here: https://www.microsoft.com/en-us/download/details.aspx?id=46697
If you are going to use the express version, adjust your VM configuration. Unfortunately SQL Express has some CPU limitations for the database engine (Limited to lesser of 1 Socket or 4 cores) and a 10 GB DB limitation. Therefore a 4 vCPU configuration would be 1 virtual sockets: 1 and 4 cores per socket. For more info about virtual sockets and cores please read this article: http://frankdenneman.nl/2013/09/18/vcpu-configuration-performance-impact-between-virtual-sockets-and-virtual-cores/
Install SQL 2014 Express ADV SP1
Run Install and select the following options:

  1. New SQL Server stand-alone instalation
  2. Accept the license terms
  3. Check “Use MS Update to check for updates”
  4. Database Engine Configuration: Mixed Mode (SQL Server Authentication and Windows Authentication) (provide password)
  5. Reporting Services Native Mode: Install and Configure

Install SQL 2014 SP1
Download the eval version of SQL 2014 SP1 here: http://technet.microsoft.com/evalcenter/dn205290.aspx
Run Install and select the following options:

  1. New SQL Server stand-alone instalation
  2. Select Evaluation
  3. Accept the license terms
  4. Setup Role: Select All Features using default values for service accounts*
  5. Database Engine Configuration: Mixed Mode (SQL Server Authentication and Windows Authentication) (provide password)
  6. Analysis Services Configuration: Add current User
  7. Reporting Services Configuration: Install and Configure
  8. Distributed Replay Controller: Add Current User
  9. Install

During the install it can happen that the install process freezes when on a step called “Install_WatsonX86_Cpu32_Action”. To solve this state, open up task manager and end all “extra” processes called “Windows Installer (32 bit) ” leaving only a single Windows Installer process.
I’m sure you can improve and optimise the SQL installation, but I haven’t really looked into this. For more information I recommend David Klee’s blog (http://www.davidklee.net/) and the book of Michael Webster “Virtualising SQL Server with VMware” (http://longwhiteclouds.com/)


INSTALLING DVD STORE
Once SQL is installed you can begin installing DVD Store.The process of installing DVD store consists of executing two scripts, the Install_DVDStore.pl script and the SQL script.
Install_DVDStore.pl script
The Install_DVDStore.pl script generates the database content (such as users and products) by creating CSV files and it generates a SQL script that allows MSSQL to create the DB2user, the databases and importing the CSV content files. In order to correctly generate these files, you must create the directories where the MSSQL Database files will be stored. I’m using a single drive for all databases, therefore I create a directory SQL\DBfiles on the E: drive (E:\SQL\DBfiles).
Please note that the workload CSV files are generated in the C:\DS2 folder! That means that if you are going to generate a 20GB database, you need at least 20GB of free space on your C:\ drive as well to temporarily store the CSV files.
Once installed SQL you can run the Install_DVDStore script in the C:\DS2 folder. I prefer to open up a command prompt to run the script. The window remains open after the script has completed successfully, allowing me to do other stuff in the mean time. If you have more trust in scripts than me, go right ahead and click on the perl script from the windows explorer.
C:\ds2\Install_DVDStore.pl. In order to create a 20GB DB in the directory E:\SQL\DBfiles, I’m going to answer the questions as follows:

  • Database size: 20
  • Database size is in MB or GB: GB
  • Database type: MSSQL
  • System type: WIN
  • Path where Database files will be stored: E:\SQL\DBFiles\ *

* Please note the trailing \ in E:\SQL\DBFiles\, this is required otherwise the script will fail.
02-Install_DVDStore
Creating the custom CSV and the sql script files took my system roughly 20 minutes. The CSV files are stored in the directory structure of the C:\DS2\Data_files. The SQL script is stored in the directory C:\DS2\sqlserverds2\. The Install_DVDStore script generated the following script: sqlserverds2_create_all_20GB. Thats the script we want to run in order to get the DB loaded with the records.
03-SQLScript
Edit the SQL script
David Klee (@kleegeek), the SQL MVP, discovered there was a slight error in the script. In order to fix this, edit the script in notepad or SQL management studio. Go to line 91 (or use find) and change (1) of GENDER VARCHAR(1) into (2) resulting in GENDER VARCHAR(2). Save and exit.
04-SQLscript-Gender VARCHAR
It seems the DS2 scripts use the SA account with an blank password. You can do two thing, go through all the scripts or change the SA password on your SQL server. If someone knows the location of the SA user in the scripts, please leave a comment. In order to change the SA password, open up the SQL 2014 management studio. (Go to start, apps, SQL Server 2014 Management Studio). Select “SQL Server Authentication” and use the SA user with the password you entered during the installation process of SQL. Go to Security \ Logins and select the SA account, go to properties and deselect the option “Enforce password policy”. Now remove the password and click on OK. Yes you are sure you want to continue so click on Yes 😉 Exit the management studio.
Execute the SQL script
Go to the C:\DS2\sqlserverds2 directory and click on the sqlserverds2_create_all_20GB script. This opens SQL2014 management Studio and you need to authenticate again. A good time to check to see if the SA account is using a blank password, use the SA user account and click on connect.
Management Studio shows the script, press F5 to execute or go to the Query menu and click on Execute. In the bottom left corner, it will show executing query. Select the Message tab to monitor the progress of the script. It took my system 1 hour and 5 minutes to complete the script, it might be a good time to start working on the “workload” VM that’s going to generate the queries in the mean time. After the script finishes, it’s time to run a SQL maintenance task. Although the script creates a 20GB database, 37GBs of space is consumed on the hard disk.
05-Diskspace
SQL2014 Maintenance Plan
In the DVD Store documentation it’s recommended to run the maintenance plan to optimize performance. The SQL Agent service is turned off by default in SQL 2014. Start this service by opening a command prompt and type in the command: net start sqlserveragent otherwise the follow error will be presented when attempting to create a maintenance plan in SQL Management Studio:
06-Agent XP error
Open the SQL Server 2014 Management Studio(GUI), follow following steps:

  1. Go to Object Explorer and click and expand database server tree.
  2. Under server tree, expand management and right click on maintenance plans.
  3. Left Click on “Maintenance Plan Wizard Option”.
  4. In the wizard opened, click next and enter name of plan as “ds2”.
  5. Click next and check “Update Statistics” checkbox and again click next.
  6. Click next and then choose database as DS2 and click OK.
  7. Ensure “All existing statistics” and “Sample By” checkbox are set along with value “18” “percent”.
  8. Once above step is done click next twice to create a task under “Maintenance Plans” under “Management” object under SQL Server tree.
  9. Now right click on this task “ds2” created from above steps and it will show a menu option for right click.
  10. Click execute to update statistics on all tables in DS2 database using task created due to above steps.

Visit the sites of the SQL experts to learn more about optimizing SQL DB’s if you want to get more performance out of this database. At this point, the Database VM configuration is complete and we can start generating some workload by running the ds2sqlserverdriver program on the worload VMs.


DS2 WORKLOAD VM
Unfortunately the DS2webdriver kept on crashing on a Windows 2012 system, complaining about invalid registry settings. Therefor I’m using a Windows 2008 system. The configuration of the VM is straightforward. Ensure that the workload VM can connect to the database VM across the network and run the ds2sqlserverdriver program.
Database VM configuration

  • OS: Windows 2008
  • CPU config:
  • Number of virtual sockets: 2
  • Number of cores per socket: 1
  • Memory 12GB
  • Harddisk 1: 40 GB
  • SCSI controller 0: LSI Logic SAS
  • Network Adapter: VMXNET 3

Windows 2008 configuration

  • Update Windows 2008 with all the latest patches, service packs and update VMtools.
  • Download SP1 here: https://www.microsoft.com/en-us/download/details.aspx?id=5842
  • Disable the firewall. *
  • Enable remote desktop if you don’t want to use the VM console
  • Enable .Net 3.5 if you want to install SQL management studio

* As this I run an air gapped lab I don’t want to spend too much time on firewall rules)
DS2SQLSERVERDRIVER
Extract the ds2.tar.gz and ds2_sqlserver.tar.gz on the C:\.
Open command prompt and go to c:\ds2\sqlserverds2\ and run ds2sqlserverdriver.exe. This will show the options:
07-ds2sqlserverdriver
An example script (by David Klee):
c:\ds2\sqlserverds2\ds2sqlserverdriver.exe --target=192.168.0.132 --run_time=60 --db_size=20GB --n_threads=4 --ramp_rate=10 --pct_newcustomers=0 --warmup_time=0 --think_time=0.085
08-Running script
This program allows you to customize every workload possible. The command that I like the most is the think time. This is the amount of time that a simulated user would ‘think’ before clicking again. This command allows you to create a more realistic workload that differs from any synthetic benchmark tool out there. You can run spawn multiple virtual machines running different configured workloads against a single database. Adjust the think time, adjust the average number of search order per customer. The application stack allows you to investigate the complete stack. You can run multiple workload VMs and the DB VM on a single host, allowing to understand CPU or memory contention. It allows to distribute the workload across multiple hosts, allowing you do dive into the impact of networking and possibly DRS. Moving VMs onto a single datastore and monitor the storage path and the impact of SIOC. The possibilities are endless. Genuinely a tool that can help anyone at any level understand virtualization and IT infrastructures better.

Filed Under: Home Lab, VMware

  • « Go to Previous Page
  • Page 1
  • Interim pages omitted …
  • Page 12
  • Page 13
  • Page 14
  • Page 15
  • Page 16
  • Interim pages omitted …
  • Page 28
  • Go to Next Page »

Copyright © 2026 · SquareOne Theme on Genesis Framework · WordPress · Log in