Katarina tweeted a very expressive tweet about her love/hate (mostly hate) relation with CPU pinning, and lately I have been in conversations with customers contemplating whether they should use CPU pinning.
The analogy that I typically use to describe CPU pinning is the story of the favorite parking space at your office parking lot. CPU pinning limits the compliant CPU “slots” for that vCPU to be scheduled on. So think about that CPU slot as the parking spot closest to the entrance of your office. You have decided that you only want to park in that spot. Every day of the year, that’s your spot and no other place else. The problem is, this is not a company-wide directive. Anyone can park in that spot, but you just limited yourself to that spot only. So it can happen that Bob arrives at the office first and lazy as he is, he will park to the office entrance as close as he can. Right in your spot. Now the problem with your self-imposed rule is that you cannot and will not park anywhere else. So when you show up (late to the party), you notice that Bob’s car is in YOUR parking spot, and the only thing you can do is to drive circles in some holding pattern until Bob leaves the office again. The stupidest thing. It’s Sunday, and you and Bob are the only ones doing some work. You’re out there on the parking lot, driving circles waiting until Bob leaves again, while Bob is inside in the empty building waiting on you to get started.
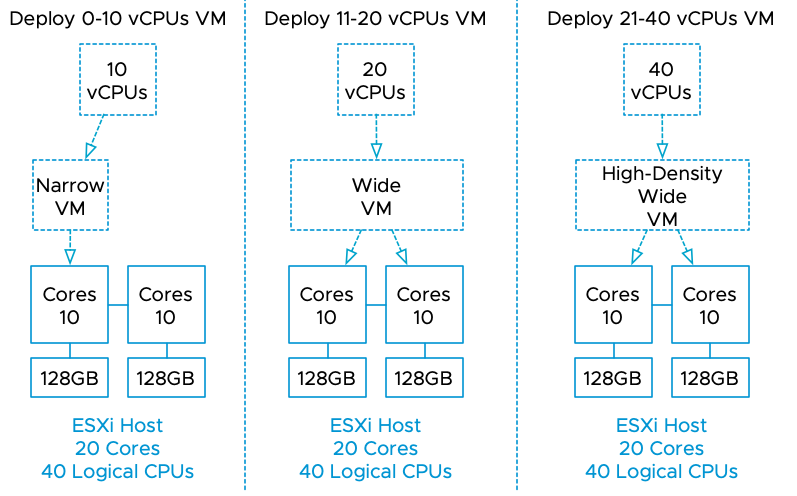
CPU pinning is not an exclusive right for that vCPU to use that particular CPU slot (Core or HT). It’s just a self-imposed limitation. If you want exclusive rights to a full core, check out the setting Latency Sensitivity