Two weeks left before the biggest VMware show is happening again, and I can’t wait for it to start. The last eight years I’ve been going to both the US and European show, and both have their own charm. But there is one thing that every VMware community member should experience, and that is the US welcome reception in the solution exchange on Sunday night. Almost every attendee in one big room, the buzz is just phenomenal.
I recently joined Kit Colbert‘s team, the CTO of Cloud Platform business unit. In my new role, I work on upcoming products and influence their strategy. One project I focus on is how VMware can help customers to run Kubernetes successfully on vSphere. Please reach out to me at VMworld if you have ideas or feedback. Luckily I will be presenting a few sessions this year as well, and I hope to see you there:
VIN1249BU
vSphere Clustering Deep Dive, Part 1: vSphere HA and DRS
2018-08-27
12:30 PM
The legendary session is back, Duncan and I talking about vSphere 6.7 HA and DRS. There is so much to tell, but we are hoping to keep some time open for some questions.
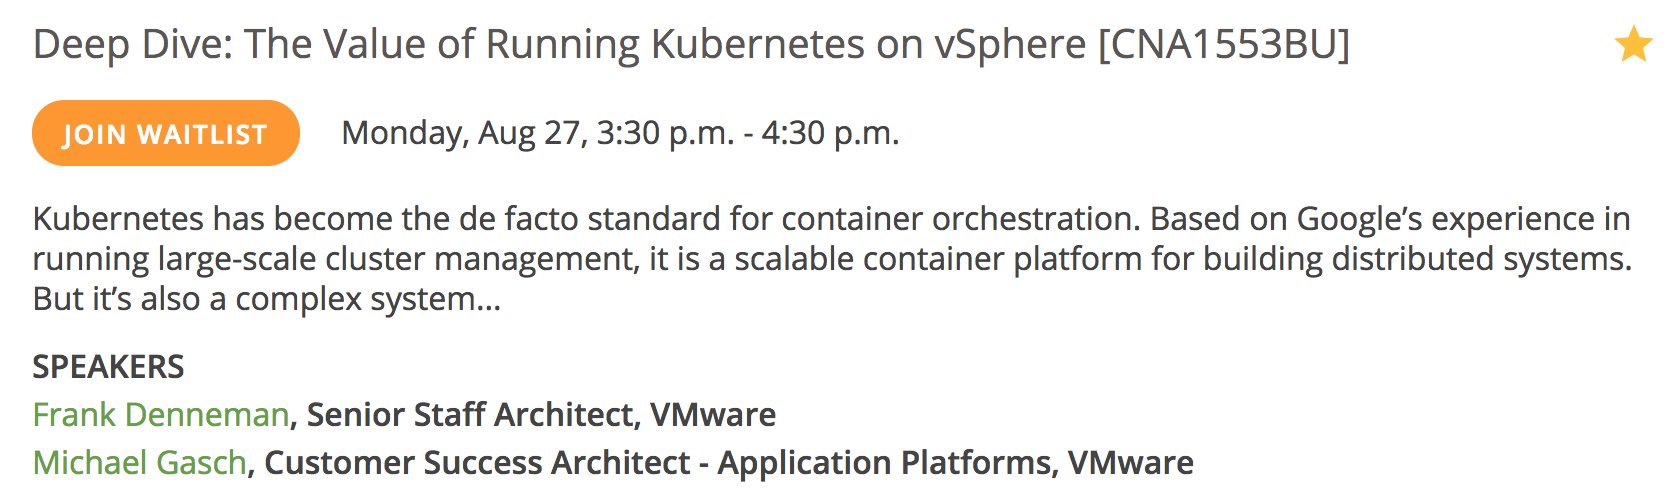
CNA1553BU
Deep Dive: The Value of Running Kubernetes on vSphere
2018-08-27
3:30 PM
I’m so much looking forward to this session, together with Michael Gasch, our resident Kubernetes expert, and popular Kubecon speaker. In this session, we will go over the reasons why vSphere and Kubernetes are better together and provide you with some guidelines on how to successfully run your kubernetes environment.
VIN2256BU
Tech Preview: The Road to a Declarative Compute Control Plane
2018-08-28
12:30 PM
I tweeted about every session on this list except this one. The reason why I had to keep quiet about this session is that we are showing some NDA stuff. In this session, Maarten Wiggers and I look at the changes that are happening in the industry. Most companies develop their strategic apps in-house, impacting the role of the VI-admin. We will go over the transformation from VI-admin to Site Reliability Engineering. With new technologies and different Life Cycle Management strategies, different ways of managing applications and infrastructure are necessary. We go over the changes from an infrastructure that responds to Imperative statements to an environment that is controlled by declarative statements. Within the software-defined data center (SDDC), VMware vSphere offers two declarative control planes: one for networking and one for storage. However, there is no declarative control plane for compute yet. We will tech preview the capabilities introduced in the VMware Cloud SDDC as a path to achieve that goal.
VIN1738BU
vSphere Host Resources Deep Dive: Part 3
2018-08-29
2:00 PM
The third edition of the vSphere Host Resources Deep Dive. The vSphere platform is designed to run most workloads at near bare-metal performance. More than enough for more than 95% of the workload. But what if you need to squeeze out that last bit of performance? How can you do it and how will it impact the rest of the system? Please join Niels and me on Wednesday at 2:00 PM.
vSphere 6.x Deep Dive Resource Kit Completed
The new version of the vSphere clustering deep dive is available on Amazon. The vSphere 6.7 Clustering Deep Dive is the fourth edition of the best selling series. Over 50.000 clustering deep dive books have been distributed, and I hope this version will find its way on your desk.
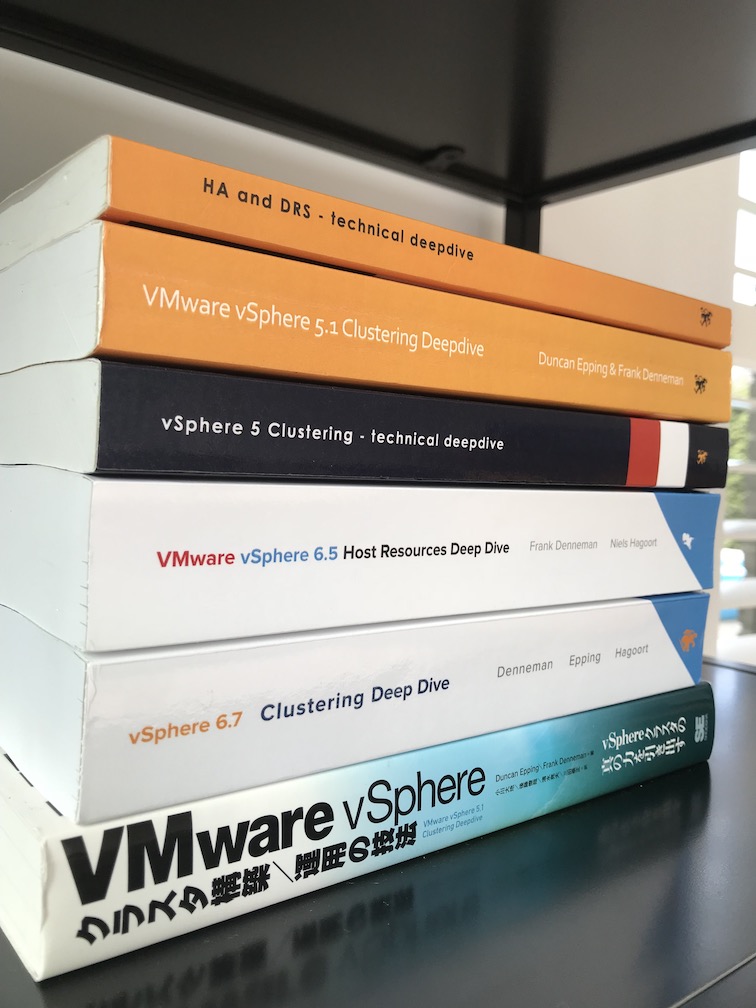
The new version of the clustering deep dive covers HA, DRS, Storage DRS, Storage I/O Control and Network I/O Control. In the last part of the book, we bring all the theory together and apply it to create and describe a stretched cluster configuration.
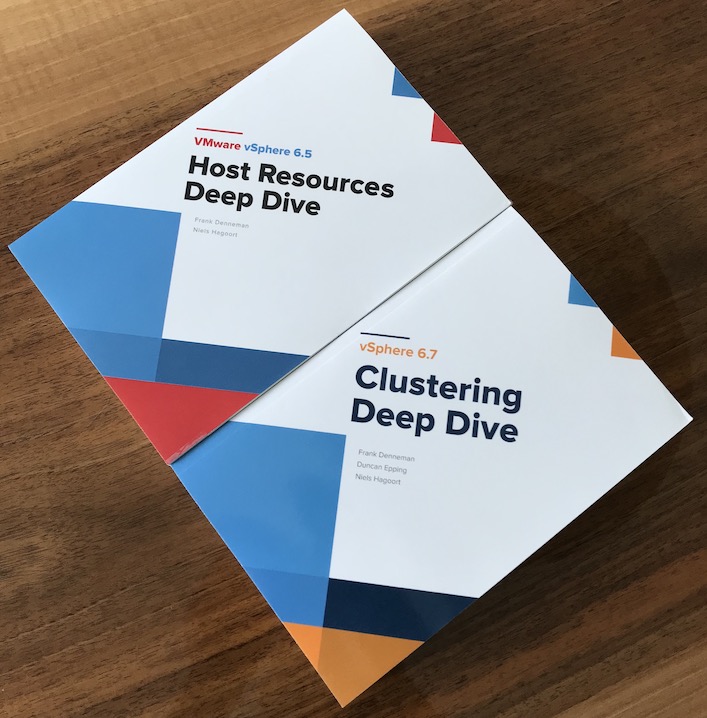
Now, why am I using the title vSphere 6.x Deep Dive Resource Kit? Well, it’s because we believe that when you pair this with the vSphere 6.5 Host Resource Deep Dive book, you get this bundle that allows you to understand the core of your virtual infrastructure.
Changing the Game
When Duncan and I set out to write the 4.1 HA and DRS deep dive, we wanted to change the content of technical books. Instead of having a collection of screenshots paired with the text, next, next finish, we wanted to provide a thorough explanation of what happens under the cover. When you push this button, this happens in the code. By uncovering the inside, we arm the administrator and architect with the knowledge to create or troubleshoot any architecture anywhere.
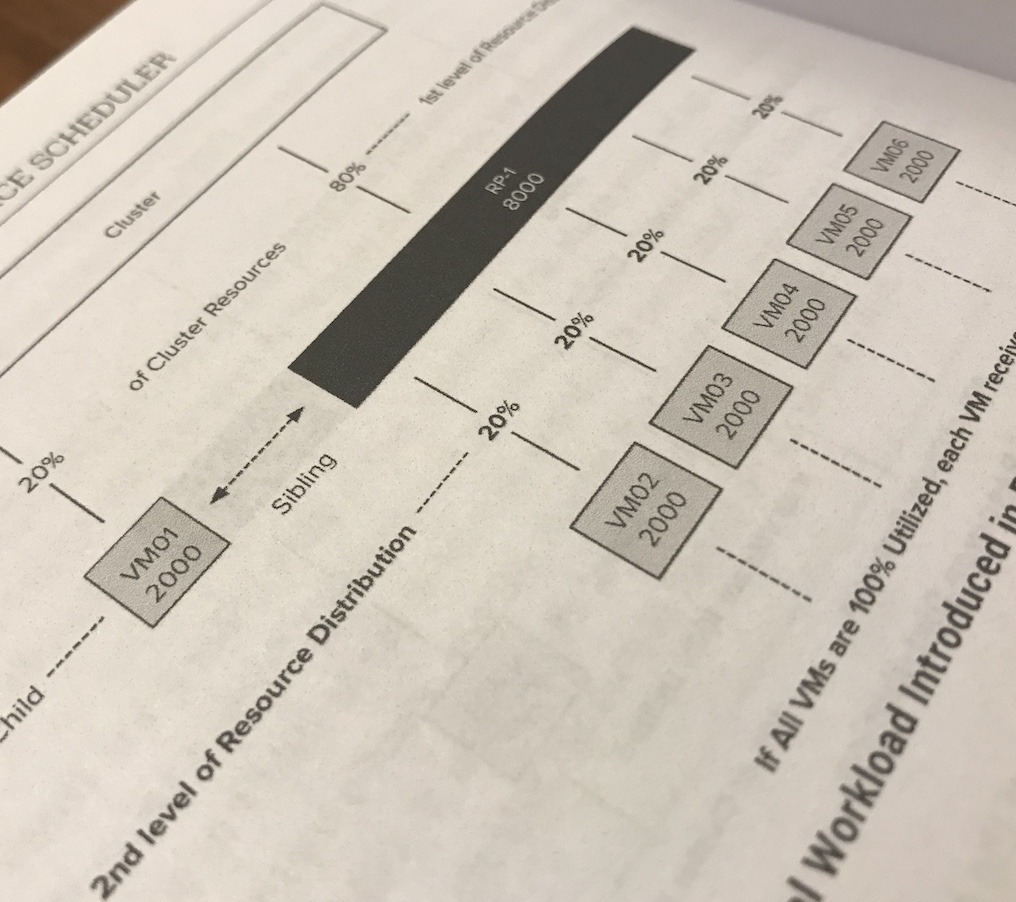
When combining these books together, it creates a real end-to-end guide for your architecture. For example, in the DRS section, we explain how the cluster determines the resource entitlement of the VMs in a resource pool. In the vSphere 6.5 Host resource deep dive, we describe the inner workings of the memory and CPU scheduler and how they allocate the physical resources based on the resource entitlement of the VM.
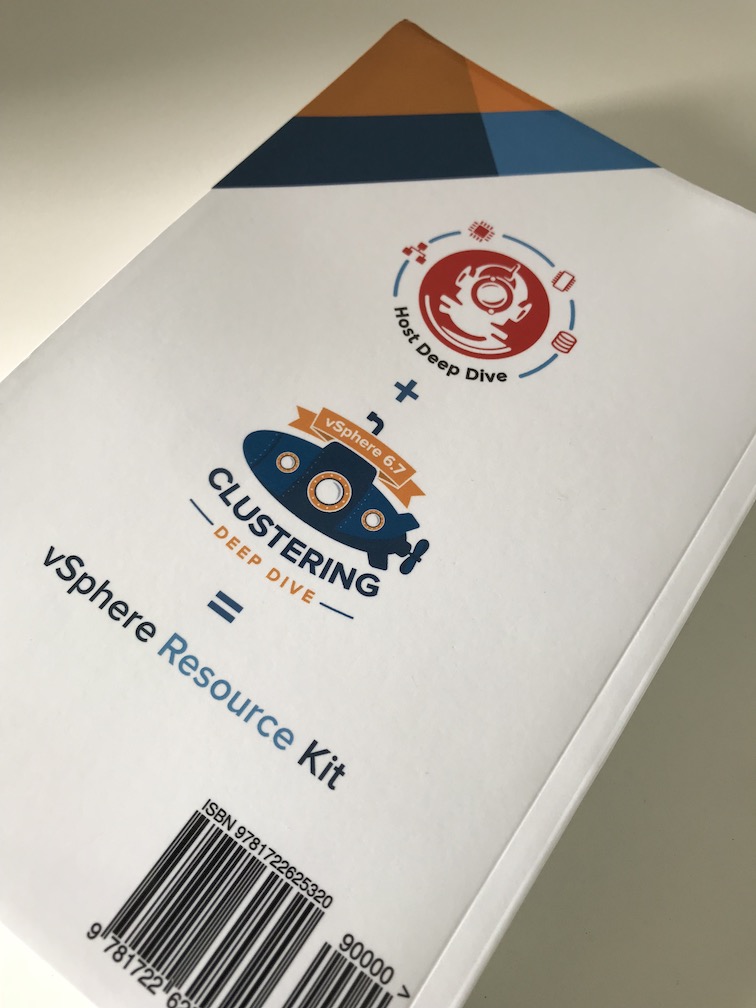
Back Side of the Book
When releasing the host resource deep dive, we came up with a cool little logo of a divers helmet. If you want to get deep, you need more than a snorkel. One divers helmet to explore the host, but in the cluster deep dive, we cover multiple hosts, grouped in a cluster. What do you need when you need a lot of people to explore the deep? You need a submarine! 😉 It might even end up on some T-shirt.
New Name on the Cover
As you might have noticed, a new name appears on the cover. We asked Niels Hagoort to help us to cover the quality of service aspect of the book. Niels dove into the deeps of Storage I/O Control and Network I/O Control and created an excellent addition to the book.

Foreword
And last but not least, the foreword. In the previous books, industry luminaries generously provided us with amazing forewords. This time we looked at the community. We asked Chris Wahl to write the introduction. Chris has been an early supporter of the book series, and he has helped the community in many ways. We asked him to provide us with his point of view.
I hope you enjoy the book as much as we enjoyed writing it.
Hotdog-Not Hotdog: The SDDC of VMware Cloud on AWS
Yesterday, Kenneth Hui was on stage at the VTUG providing his personal opinion about VMware Cloud on AWS. The reason I say personal is that he forgot to remove the Rubrik Logo’s from his slide (I checked with Rubrik).
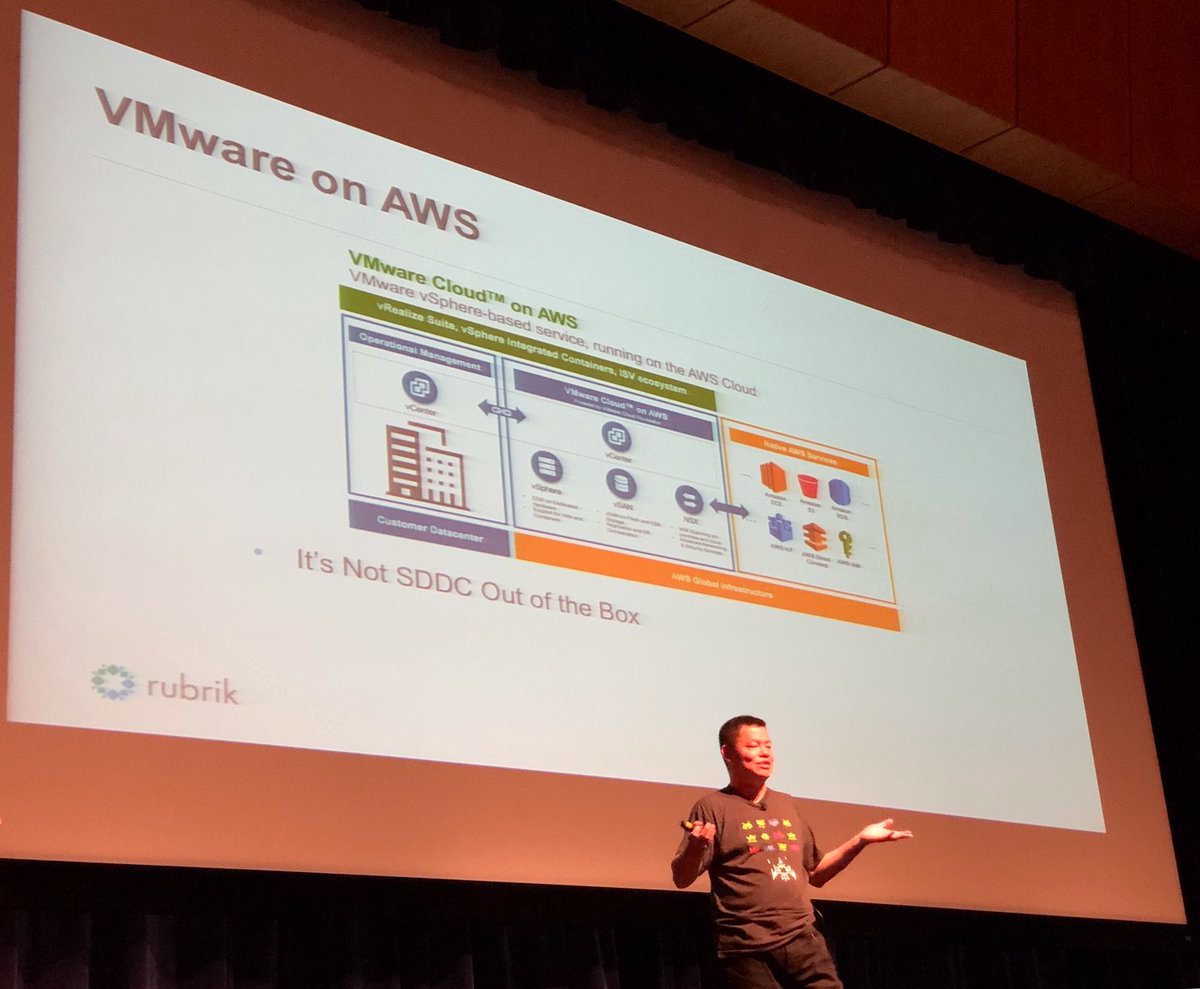
On one slide he mentions that the SDDC, that is the Software Defined Data Center provided by VMware Cloud on AWS (VMC) is not an SDDC out of the box. And to me, that sounds a bit weird. Let’s go over the process of spinning up an SDDC.
First, you log onto vmc.vmware.com and you sign up for the service. In the console you define the number of hosts for deployment, click apply.
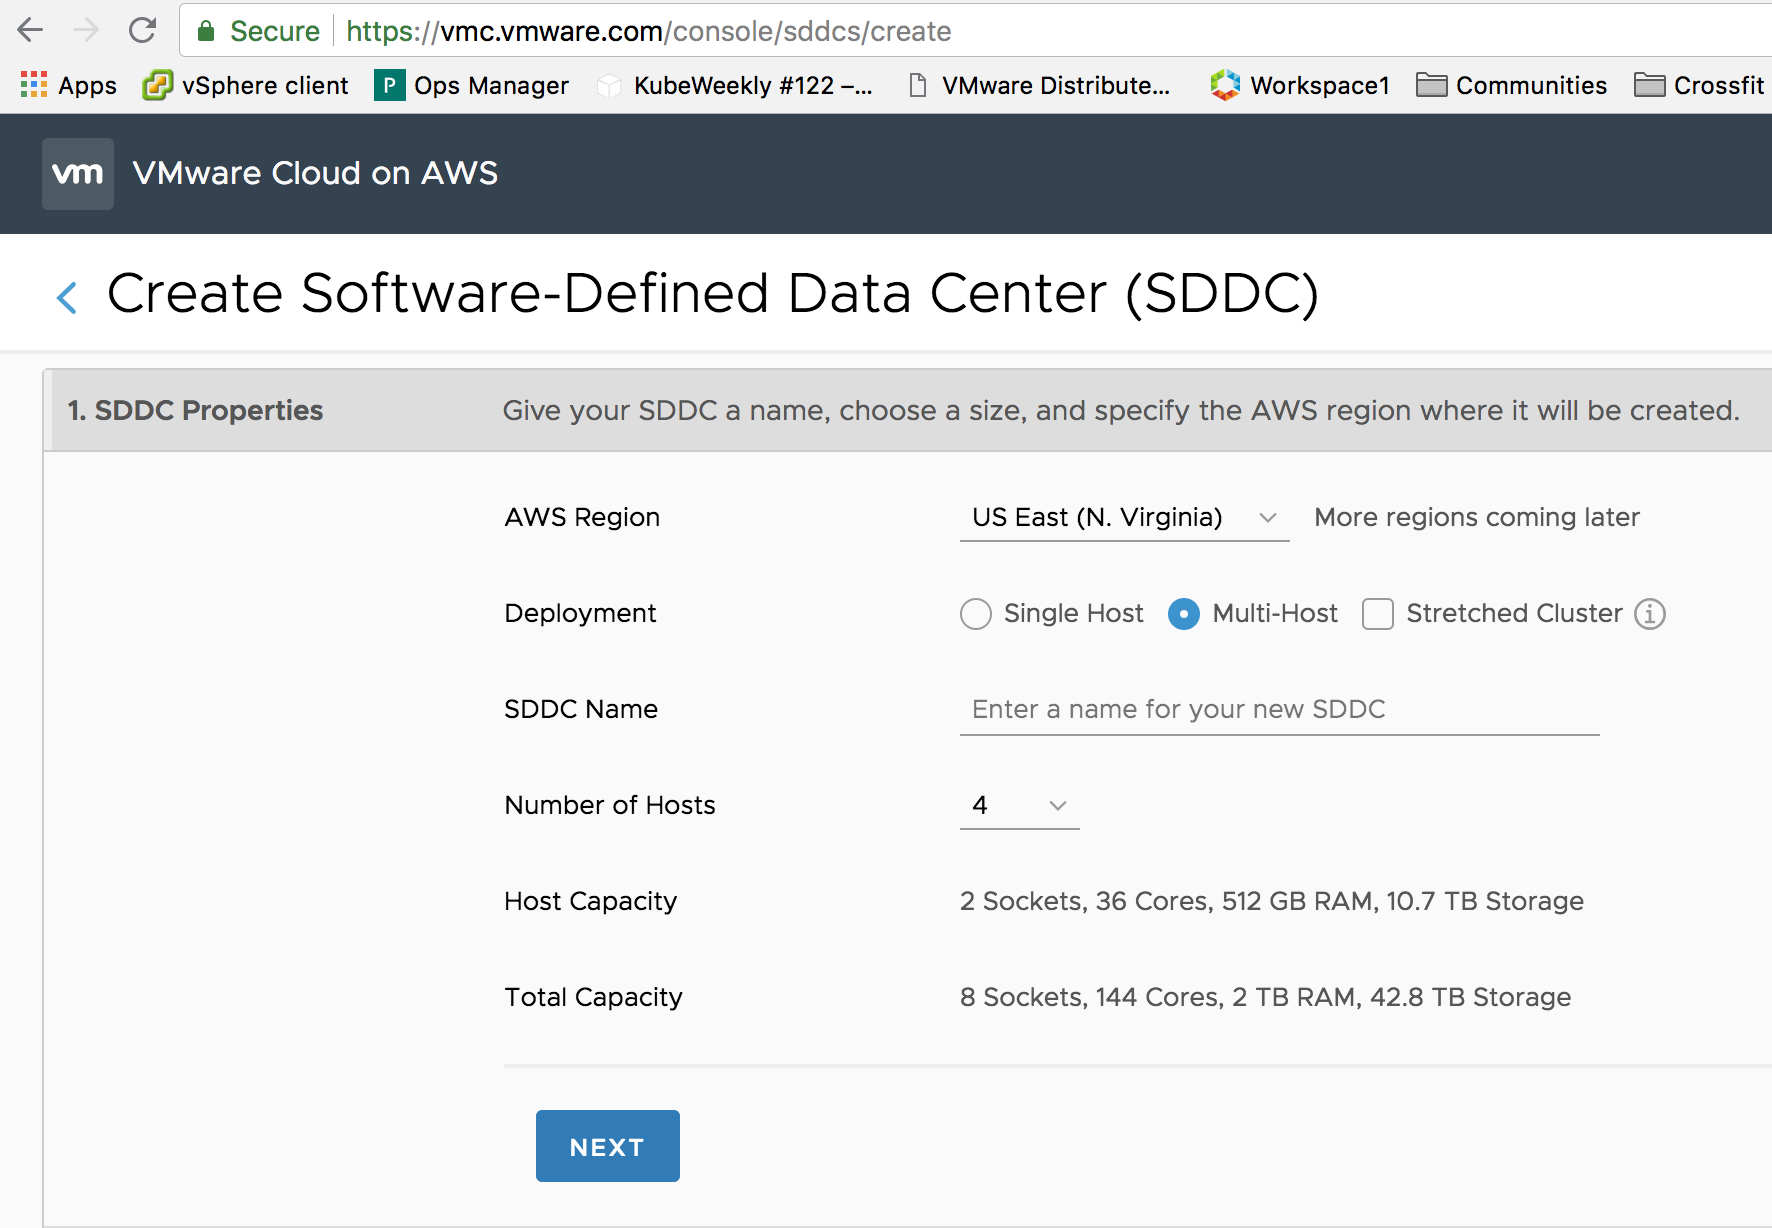
If you select a multi-host deployment, by default an SDDC cluster contains 4 hosts, that means that VMC deploys four physical hosts (for more info: Dedicated Hardware in a Public Cloud World) on the AWS infrastructure. It installs and configures vSphere, vSAN, and NSX for you automatically. After roughly two hours you are the sole-owner of dedicated hardware with a fully software-defined data center running on top of that. Just log into your in-cloud vCenter and start to deploy your workload. So to reiterate, you just clicked a button on a website and a fully functional data center is deployed for you.
From an initial deployment standpoint but I was referring to day 2 operations.
— Kenneth Hui (@kenhuiny) July 19, 2018
Ok so what about day 2 operations, let’s define this a bit clearer because there are multiple definitions available. Dzone provides the following definition: Once “something” goes into operations, “day 2 operations” is the remaining time period until this “something” isn’t killed or replaced with “something else.”
We build a cloud management platform in AWS in order to deal with day-2 operations. VMware provides the service, we will keep the lights on for you, troubleshoot and maintain your environment. This CMP plaform allows us to provide services like automated hardware remediation. If a component inside the ESXi hosts fails, such as a NIC, or an NVMe device, the backend will detect this and it will initiate a process to replace the faulty host with a fully operational one. The customer won’t have to do a thing.

Elastic DRS allows the cluster to respond to workload utilization automatically. It allows for automatic scale-out and scale-in, without the need for human intervention.
Stretched Clusters protects the workload in the Cloud SDDC from AZ outages. If something happens, HA detects the failed VMs and restarts them on different physical servers in the remaining AZ without manual human involvement.
Content library, allows the customer to subscribe the in-cloud SDDC to a template repository that automatically provides VM templates to the in-cloud SDDC. Read Williams post for more info
Disaster Recovery as a Service, just go to the console, enable the add-on and the in-cloud components for SRM and vSphere Replication are automatically deployed and configured. Connect it to your on-prem components and you can build your DR runbooks.
And there are many more functions that cover the lights-on, maintenance, housekeeping and optimize tasks of day 2.
Now with that explained, the stories continue and a debate broke out on twitter. Some said it needs a form of CMP (eg. vRealize) for operating the SDDC.
Depends on your definition of SDDC, doesn't it?
From the DMTF definition: "resources are dynamically discovered, provisioned, and configured based on workload requirements."
Sounds like a CMP is needed to automate provisioning of resources according to that definition.
— Ken Nalbone (@KenNalbone) July 20, 2018
This is an interesting observation, for which operation? Not for life-cycle or infrastructure management. We will take care of that for you. VMC is a fully managed service by VMware. It is responsible for the uptime and the lifecycle of the SDDC.
we have built a CMP platform on the AWS infrastructure that allows us to deal with VMC. In a presentation of Chris Wegner (one of the principal engineers of VMC) the architecture is explained.
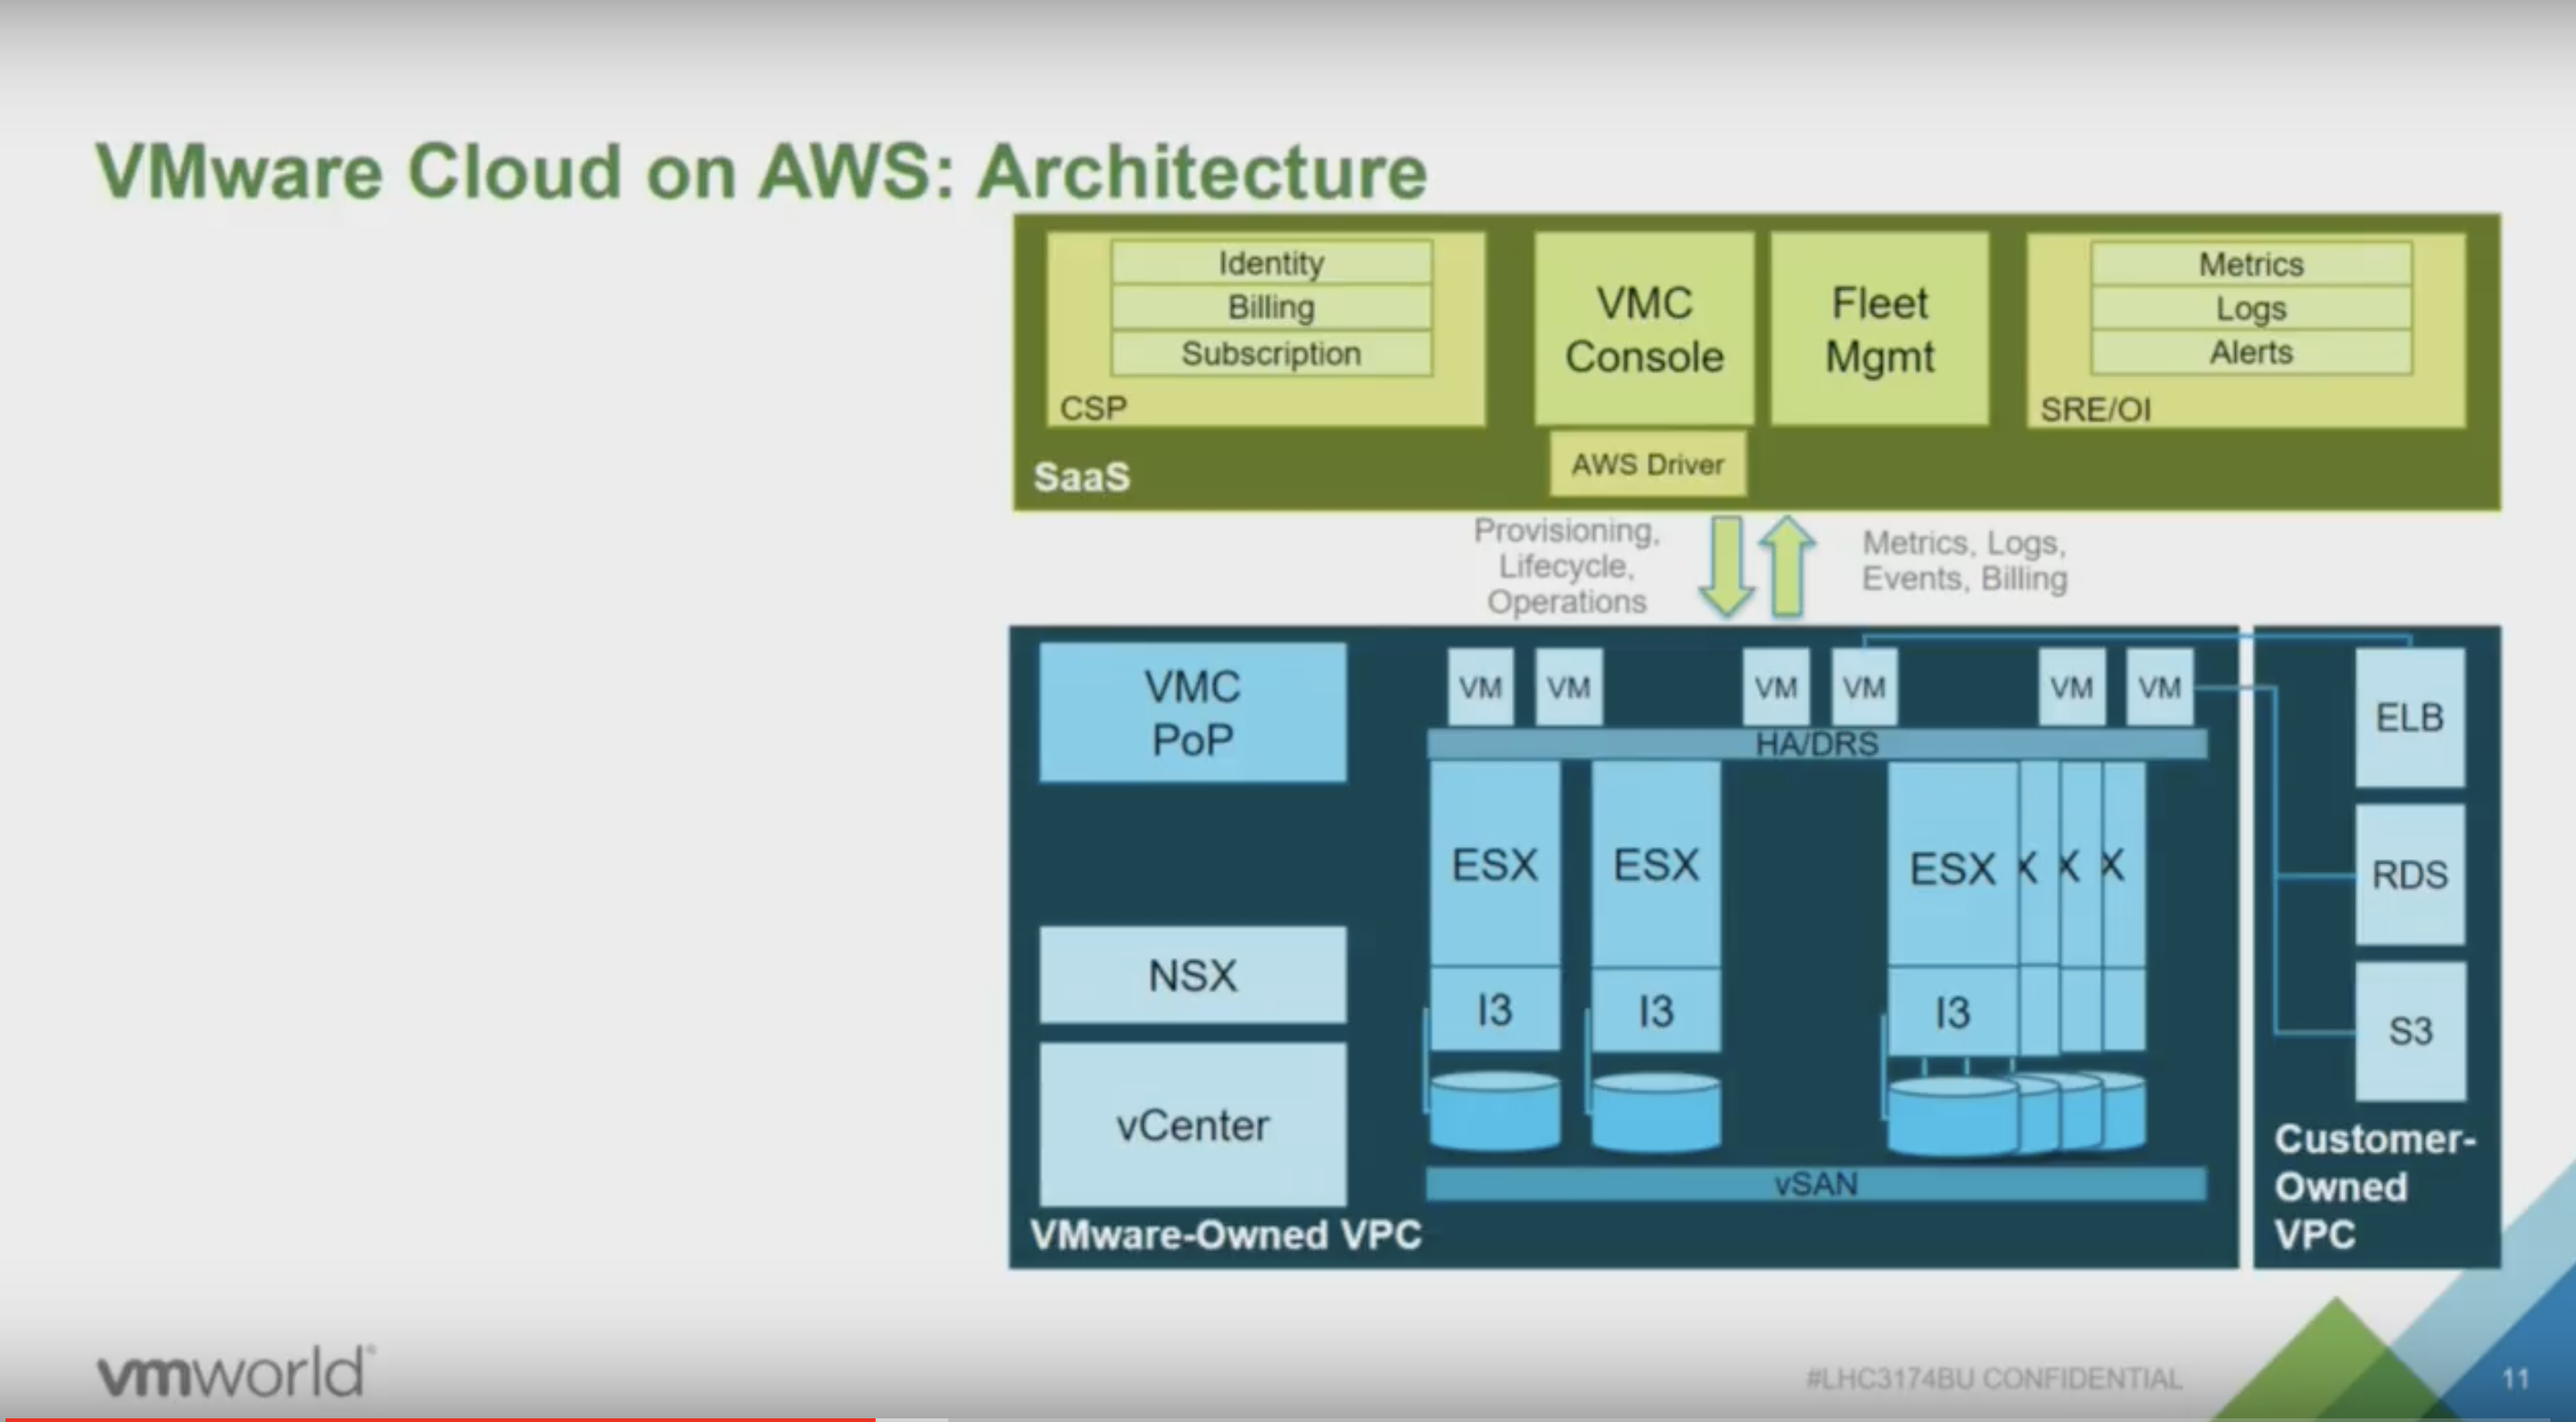
The blue box is the actual SDDC, The green box is a custom-built CMP that allows VMware to identify customers, billing customers, providing support for customers (as a VMC customer, you only deal with VMware) but most importantly for this story, it allows VMware to deploy hardware and software (Fleet management). The next image provides a more detailed view of the green box.
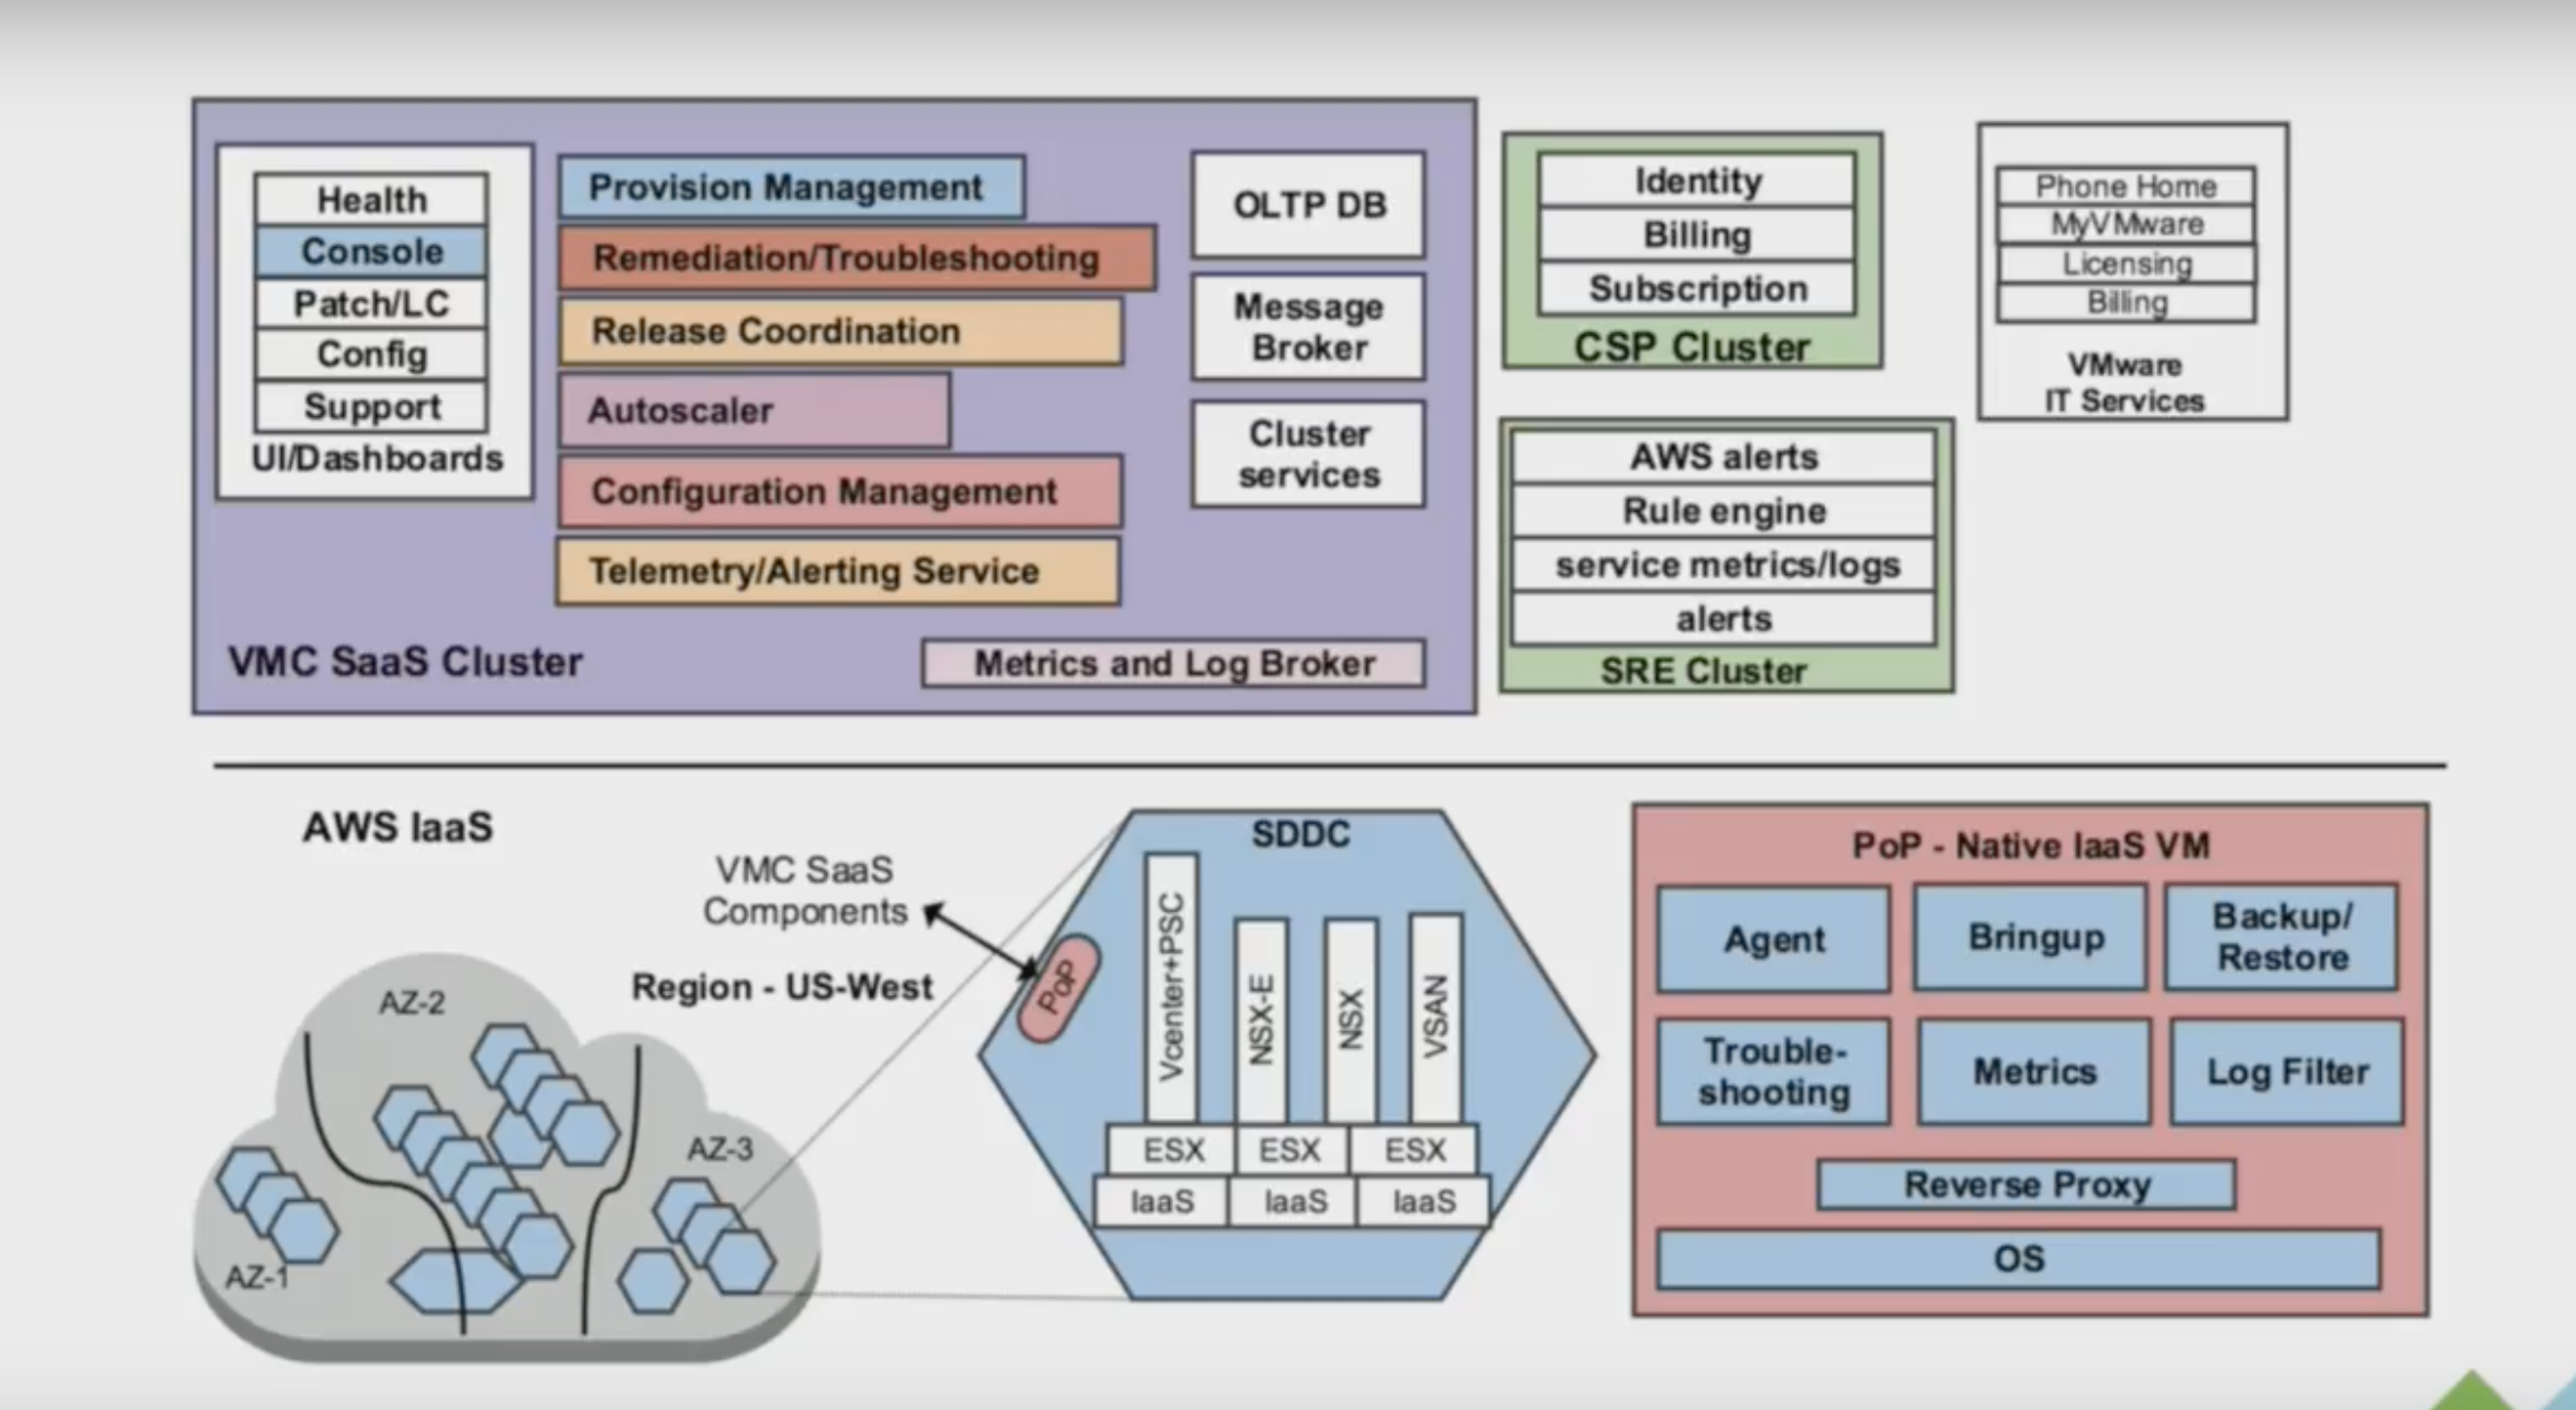
This is what you need to support hundreds of SDDCs across multiple regions (Oregon, N. Virginia, London, Frankfurt). Here you can see the bits for provisioning management, dealing with AWS services, acquiring hardware, configuring all the software and of course the ability to troubleshoot.
You as a customer, do not need to worry again about ripping and replacing hardware because it failed, or because it’s nearing the end of support. You only need to care about deploying your workload. And because we took the conscious decision of using vCenter as the management structure, you can use your on-prem vRealize suite and deploy your workload on-prem or in-cloud. Using vRealize to deploy workload is the way to go forward because 80% of our customers have a hybrid cloud strategy a on-prem deployment is expected. It makes sense to run your tooling on-premises.
With VMware Cloud on AWS, your responsibility shift from managing hardware to managing the consumption of resources.
Kubernetes and vSphere Compute and Storage Doubleheader VMworld Session
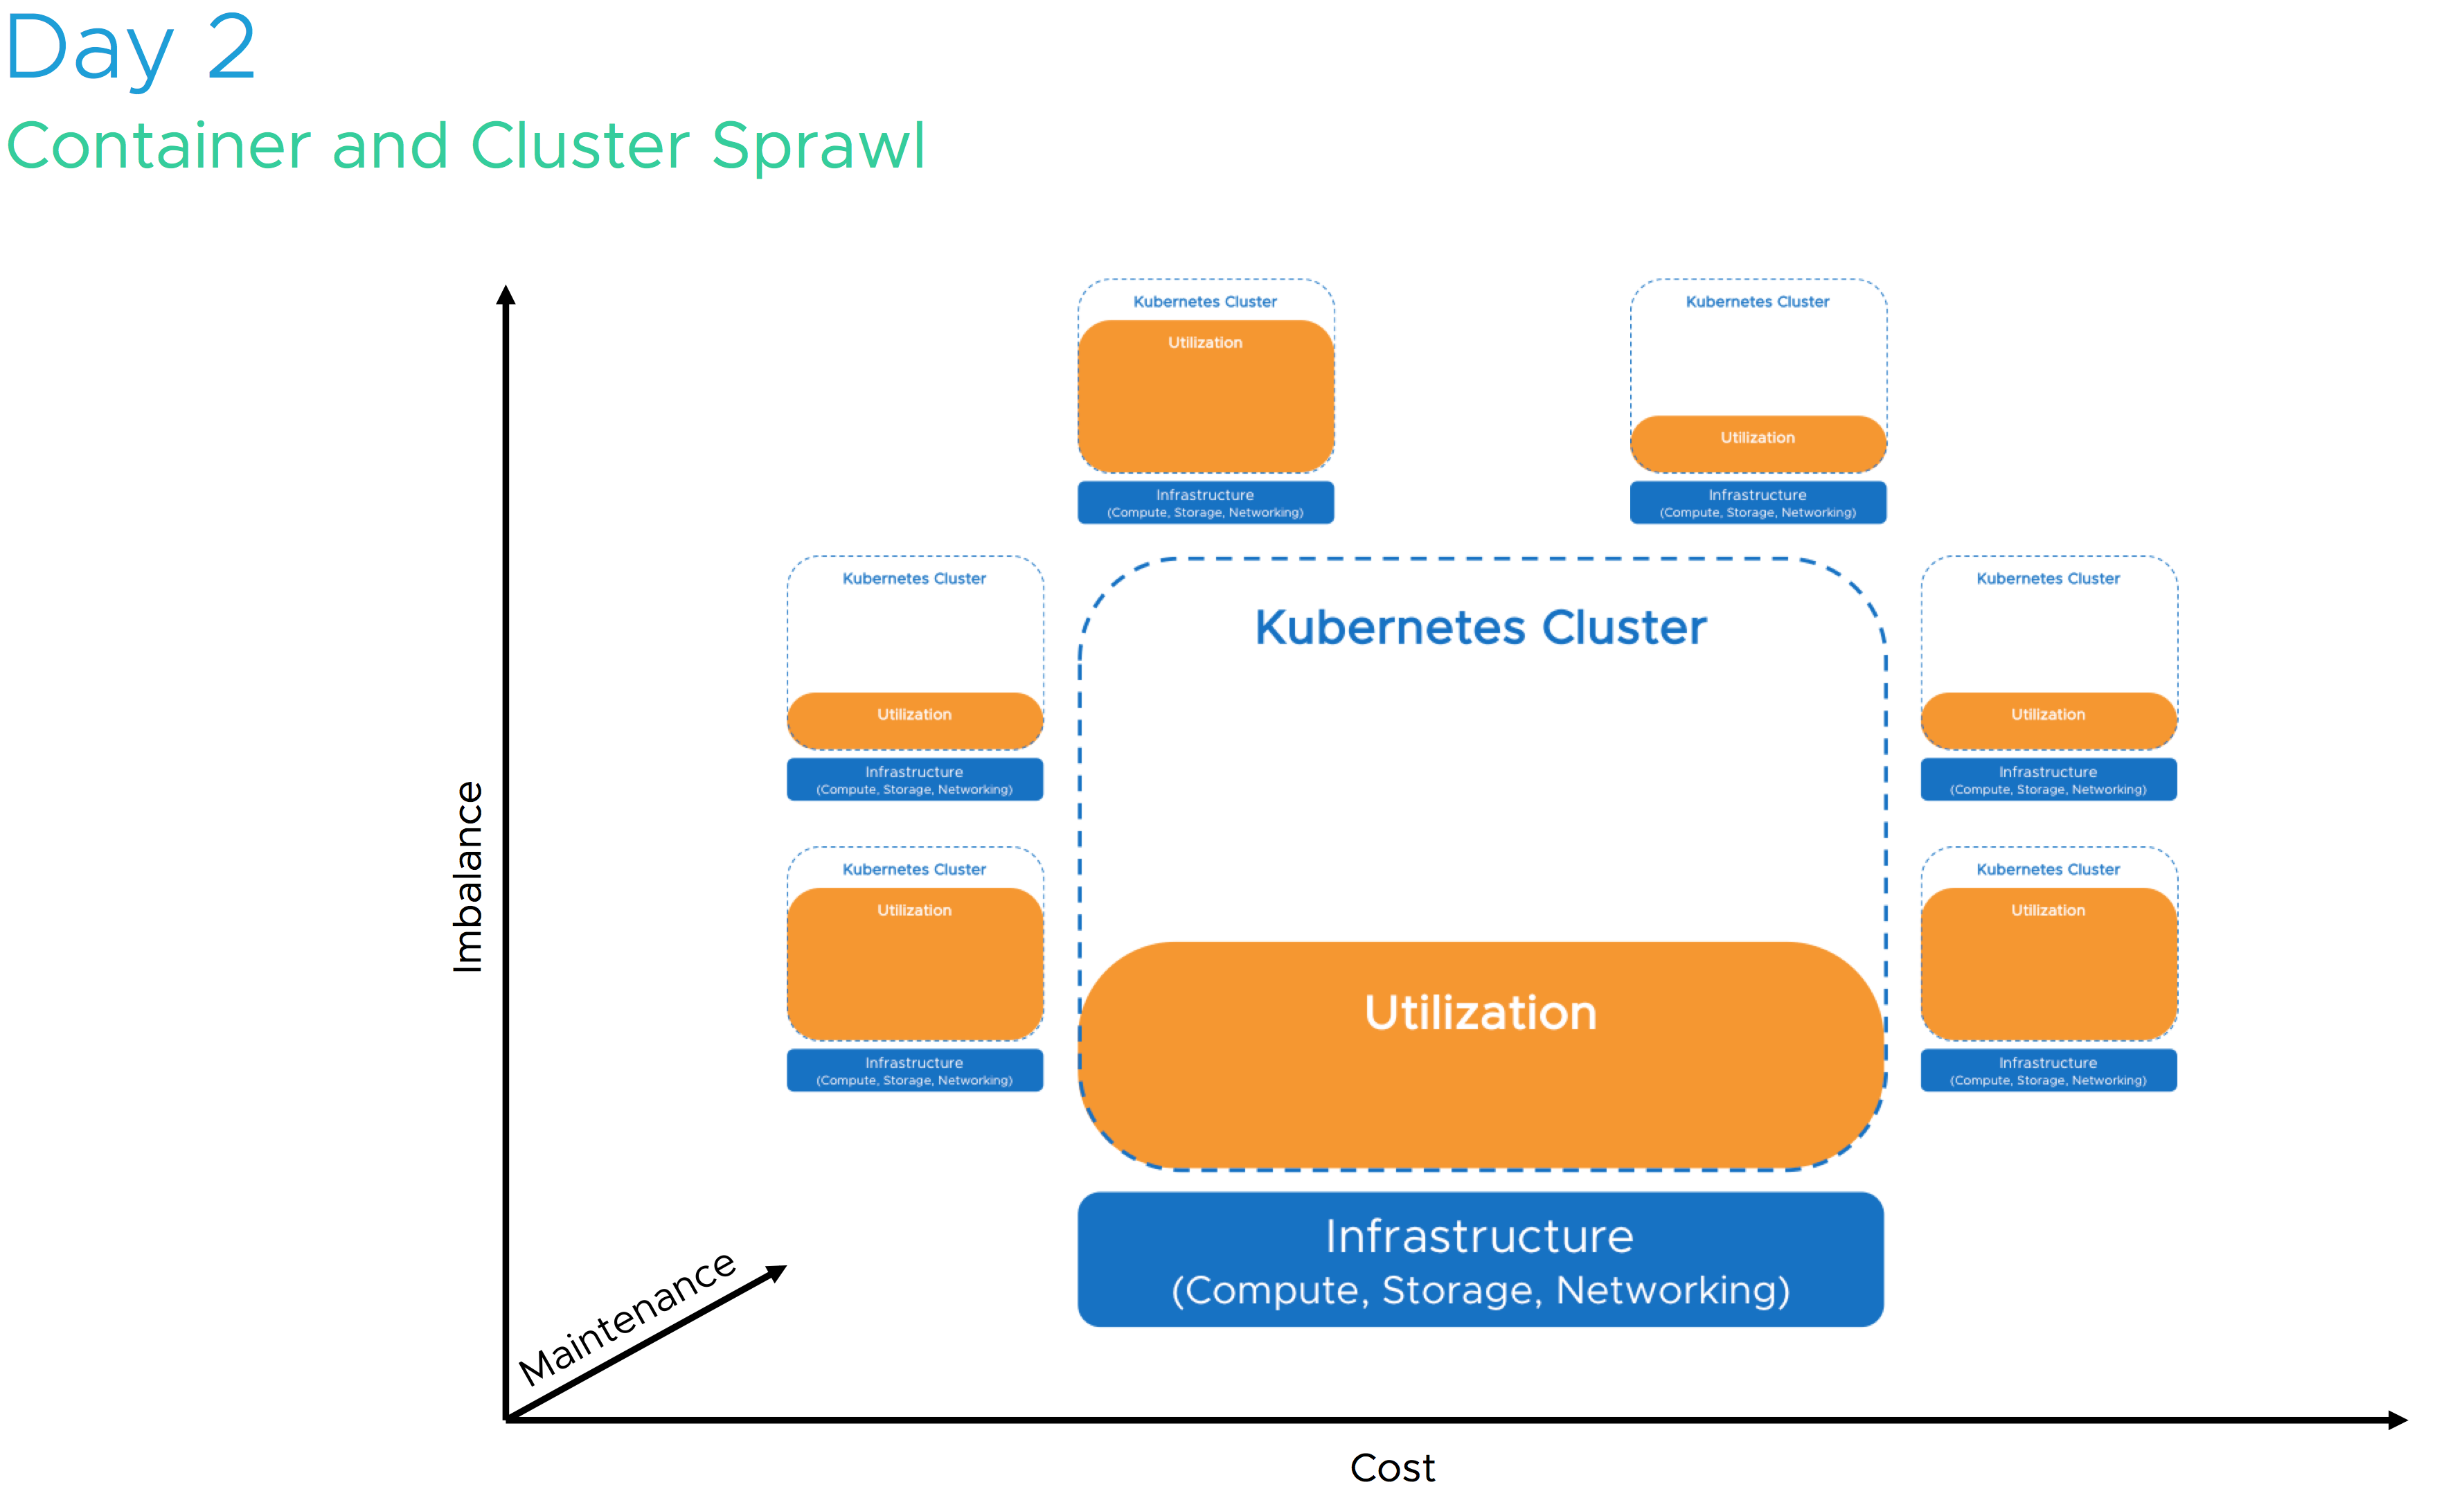
Kubernetes is hot! It is one of the most talked about technologies of this year. For some, it’s the next platform, for others it’s just another tech making its way in the datacenter. Will it replace virtual machines, will it get displace vSphere? Some ask, why run Kubernetes on top of vSphere when you can run it on bare metal? We rather not go back to 2005 and deal with a sprawl of bare-metal servers, we believe Kubernetes and vSphere are better together!
In the session “CNA1553BU – Deep Dive: The value of Running Kubernetes on vSphere” Michael Gasch and I review the behavior of Kubernetes resource management, optimization, and availability for container orchestration. Kubernetes is a system optimized for cloud-native workloads where failure and disruption is anticipated, but how about the infrastructure that is required to run these cloud-native apps? How about Kubernetes ability to economically and optimally consume the available resources?
We will answer these questions and reveal why vSphere is such a good match with its extensive features such as high availability, NUMA optimization, and distributed resource scheduler. In this session, we explore the critical elements of a container and demonstrate that Kubernetes does not run in thin air. Running Linux on bare-metal or inside a VM determines your scalability, your recoverability, and your portability. If you spin up a Kubernetes cluster at Amazon or Google, they will deploy it for you in virtual machines, if these cloud-native giants use VMs, why would you use bare-metal?
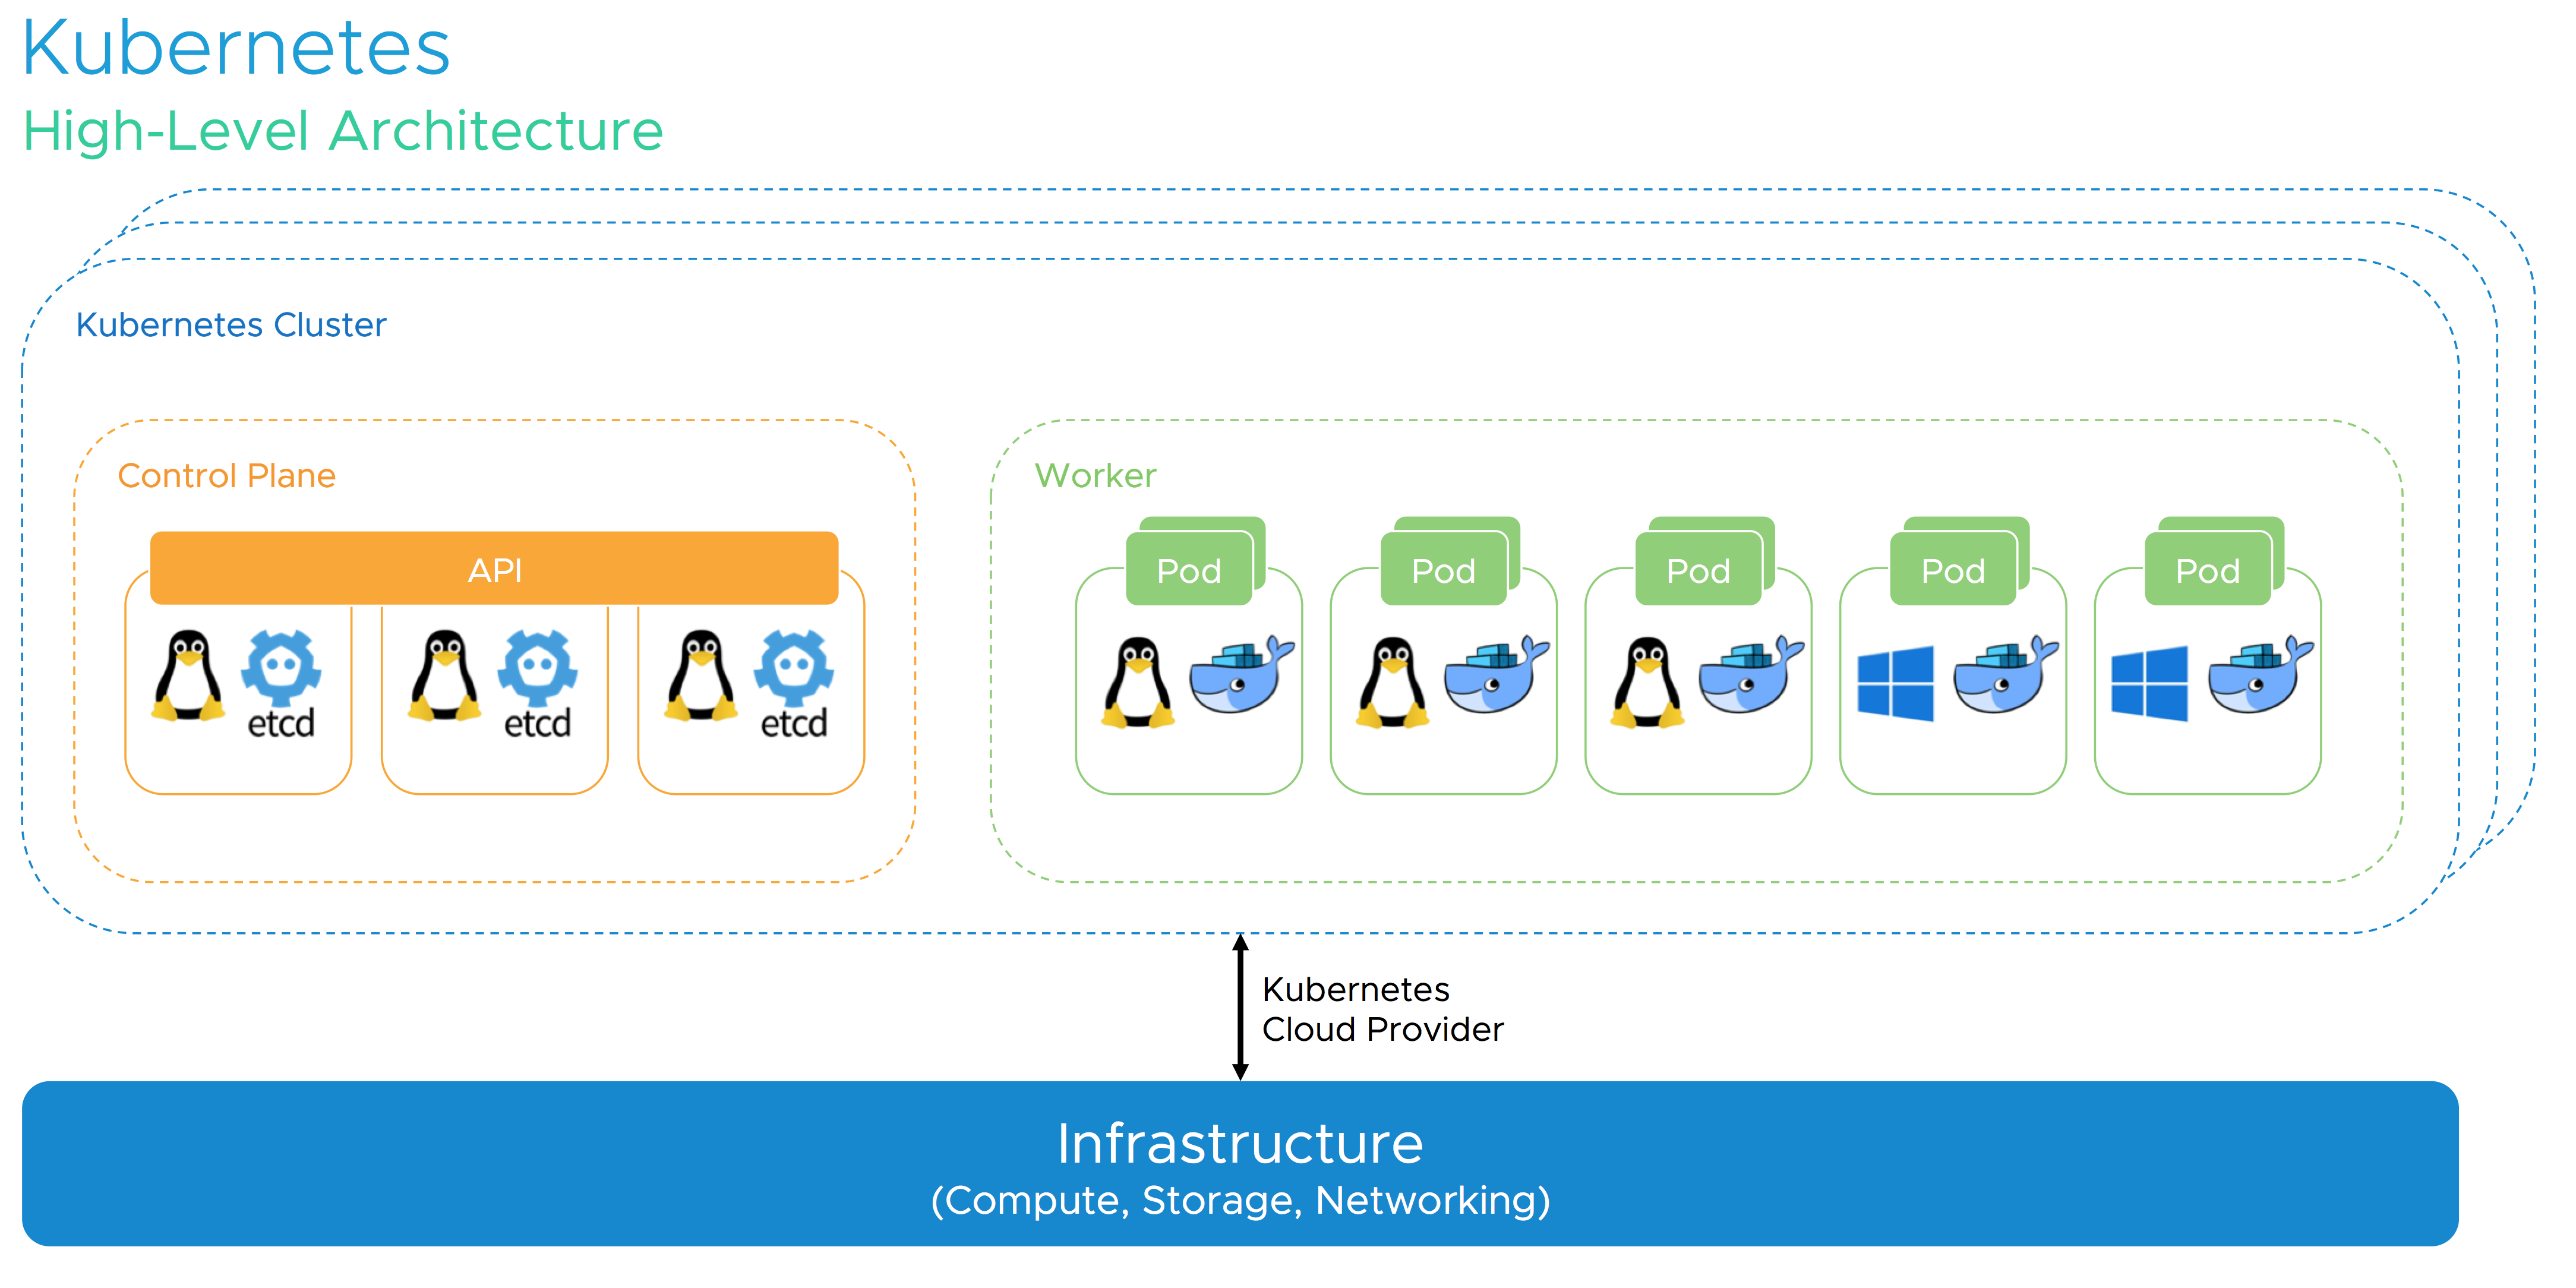
Adding vSphere to the picture, Kubernetes gains several advantages for both, cloud-native and traditional workloads. vSphere also plays a critical role in keeping the Kubernetes control plane components highly-available in case of planned and unplanned downtime. We are going to detail recommended DRS and HA settings and many other best practices for Kubernetes on vSphere based on real-world customer scenarios. Of course, an outlook on upcoming improvements for the Kubernetes on vSphere integration should not be missing in a deep dive session! Last but not least, you’ll definitely learn how to respond to common objections to win back your end-user.
Still not convinced? Let’s dive into the behavior of Linux CPU scheduling versus ESXi CPU and NUMA scheduling and help you understand how to size and deploy your Kubernetes cluster on vSphere correctly.
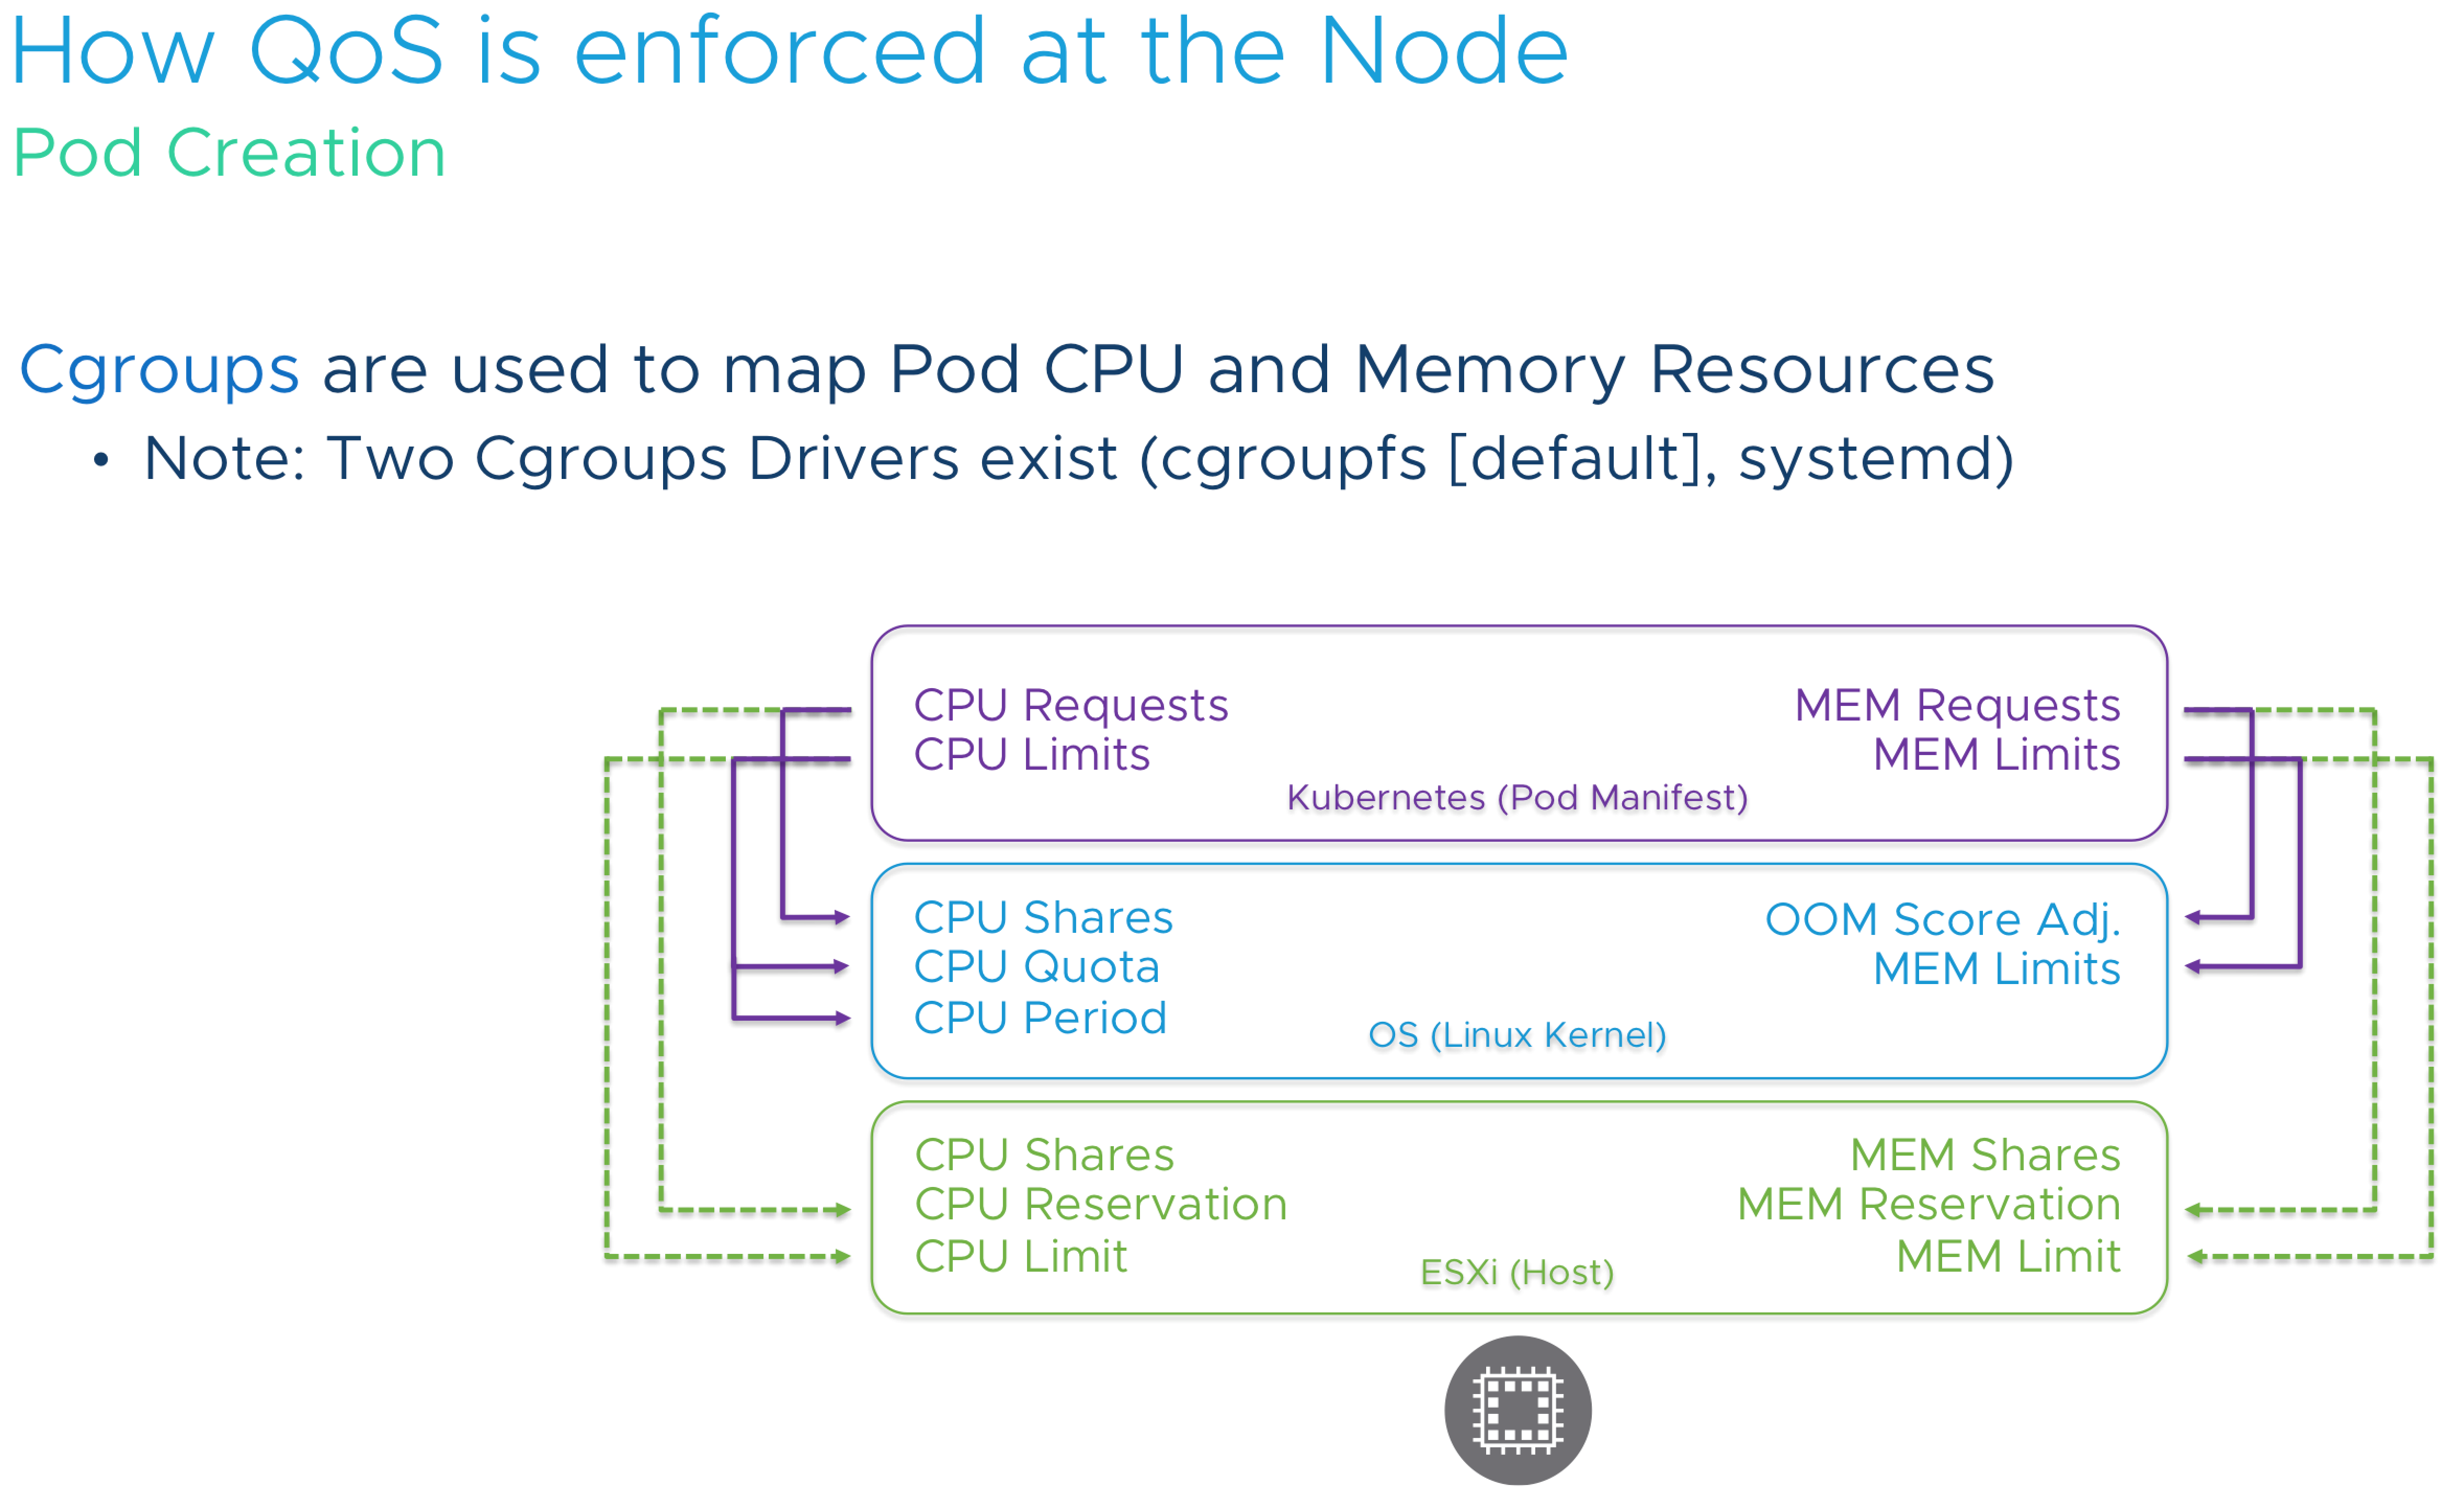
Developers shouldn’t need to worry about all these settings and the underlying layers. They just want to deploy the application, but it’s our job to cater to the needs of the application and make sure the application runs consistently and constantly. This applies to compute, but also to storage.7 out of 10 applications that run on kubernetes are stateful, so it makes sense to incorporate persistent storage in your kubernetes design.
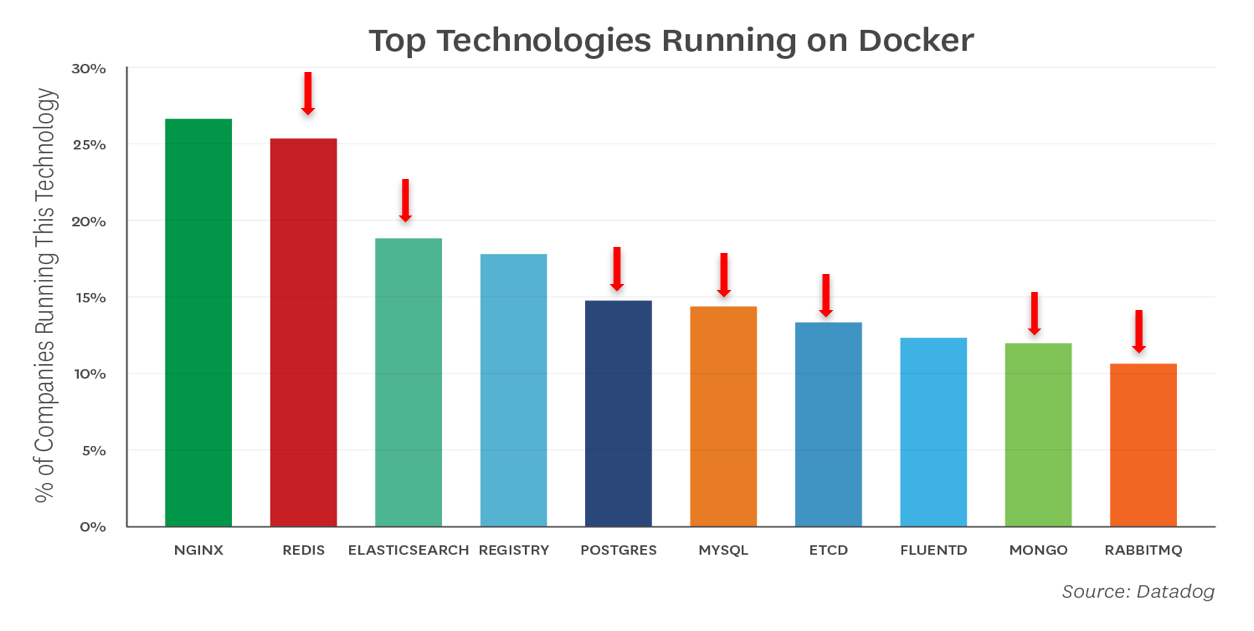
Some applications are able to provide certain services like replication themselves, thus it makes no sense to “replicate” that service at the infrastructure layer. vSAN and its storage policies allow the admin to provide storage services that are tailor-made to the application stack. Cormac Hogan and Christos Karamanolis talk about why vSAN is the ultimate choice for running next-gen apps. Visit their session “HCI1338BU-HCI: The Ideal Operational Environment for Cloud-Native Applications” to hear about real-world use-cases and learn what you need to do when dealing with these next-gen apps.
Please note that if you attempt adding these sessions to your schedule, you might get a warning that you are on the waiting list. As we understood it, all sessions are booked in small rooms and depending on the waiting list they are moved to bigger rooms. Thus sign up for these sessions even if they state waiting list only. It will be sorted out during the upcoming weeks.
Hope to see you in our session!
Introduction to Elastic DRS
VMware Cloud on AWS allows you to deploy physical ESXi hosts on demand. You can scale in and scale out your cluster by logging into the console.

This elasticity allows you to right-size your SDDC environment for the current workload demand. No more long procurement process, no more waiting for the vendor to ship the goods. No more racking, stacking in a cold dark datacenter. Just with a few clicks, you get new physical resources added to your cluster, ESXi and vSAN fully installed, configured, patched and ready to go!
Having physical resources available on demand is fantastic, but it still requires manual monitoring and manual operations to scale out or scale in the vSphere cluster. Wouldn’t it be more comfortable if the cluster automatically responds to the dynamic nature of the workloads? As of today, you can enable Elastic DRS.
Introducing Elastic DRS
Elastic Distributed Resources Scheduler (EDRS) is a policy-based solution that automatically scales a vSphere Cluster in VMware Cloud on AWS based on utilization. EDRS monitors CPU, memory, and storage resources for scaling operations. EDRS monitors the vSphere cluster continuously, and each 5 minutes EDRS runs the algorithm to determine if scale-out or scale-in operations is necessary.

Algorithm Behavior
EDRS is configured with thresholds for each resource and generates scaling recommendations if utilization consistently remains above or below their respective thresholds. EDRS algorithm takes spikes and randomness of utilization into consideration when generating these scaling recommendations.
Scaling Operations
Thresholds are defined for scale up operations and scale down operations. To avoid generating recommendations by spikes, EDRS generates a scale operation if the resource utilization shows consistent progress towards a threshold. To generate a scale out operation, a single threshold must be exceeded. That means that if CPU utilization shows consistent progress towards the threshold and at one point exceeds the threshold, EDRS triggers an event and adds an ESXi host to the vSphere cluster.

Similar to adding an ESXi host manually, the ESXi host is installed with the same ESXi version, patch level and is configured with the appropriate logical networks and adds the capacity to the vSAN datastore.

To automatically scale down the cluster, utilization across ALL three resources must be consistently below the specified scale-in thresholds.
Minimum and Maximum Number of ESXi hosts
You can restrict the bounds of a minimum and a maximum number of ESXi hosts. EDRS can be enabled if the cluster consists of four ESXi hosts, EDRS does not scale in beyond the four ESXi host minimum. When setting a maximum number of ESXi hosts, all ESXi hosts in the vSphere cluster, including those in maintenance mode are included in the count. Only active ESXi hosts are counted towards the minimum. As a result, the VMware cloud on AWS SDDC ignores EDRS recommendations during maintenance and hardware remediation operations. Currently, the maximum number of host in an Elastic-DRS enabled cluster is 16.
Scaling Policies
EDRS provides policies to adjust the behavior of scaling operations. EDRS provides two scaling policy that optimizes for cost or performance. Both policies have the same scale-out threshold. They only differ on scale-in thresholds.
| Scale Out Threshold | Performance Optimized | Cost Optimized |
|---|---|---|
| CPU | 90% | 90% |
| Memory | 80% | 80% |
| Storage | 70% | 70% |
As a result, if the cluster consistently utilizes memory over 80%, EDRS triggers a scale out operation that adds a new host to the vSphere cluster. Please note that the load is tracked at the host level and then aggregated. EDRS aggregates the CPU and memory load per fault-domain, for storage it is aggregated at the vSAN datastore level.
| Scale In Threshold | Performance Optimized | Cost Optimized |
|---|---|---|
| CPU | 50% | 60% |
| Memory | 50% | 60% |
| Storage | 20% | 20% |
In essence, the performance policy is more eager to keep the resources than the cost-optimized policy. If you set the EDRS cluster to cost-optimized, an ESXi host is removed from the vSphere cluster if CPU and memory utilization is consistently below 60% and storage utilization is consistently below 20%.
How to Configure Elastic DRS
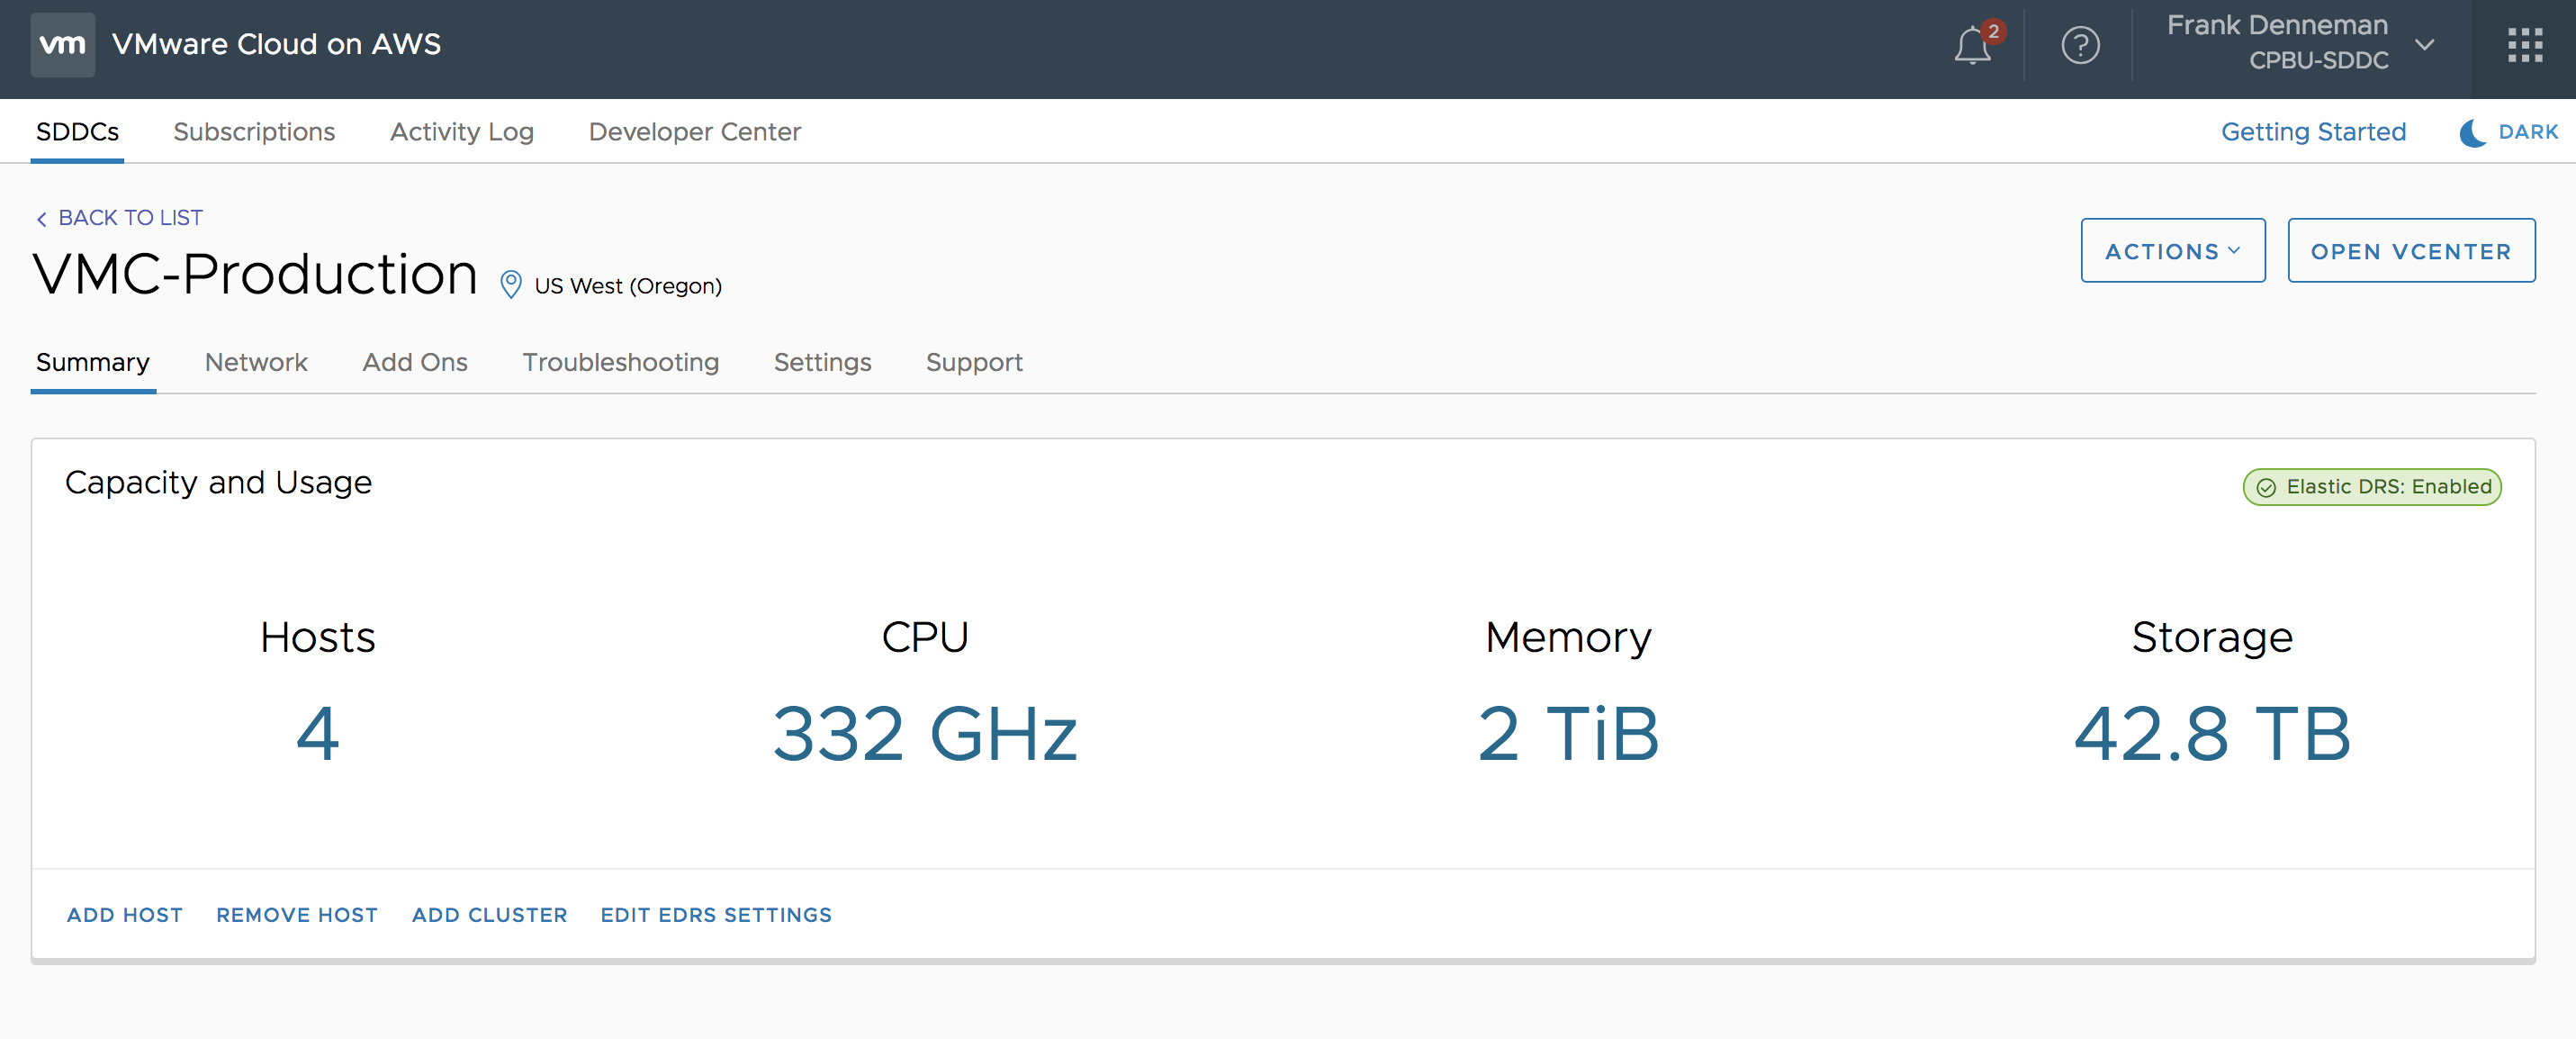
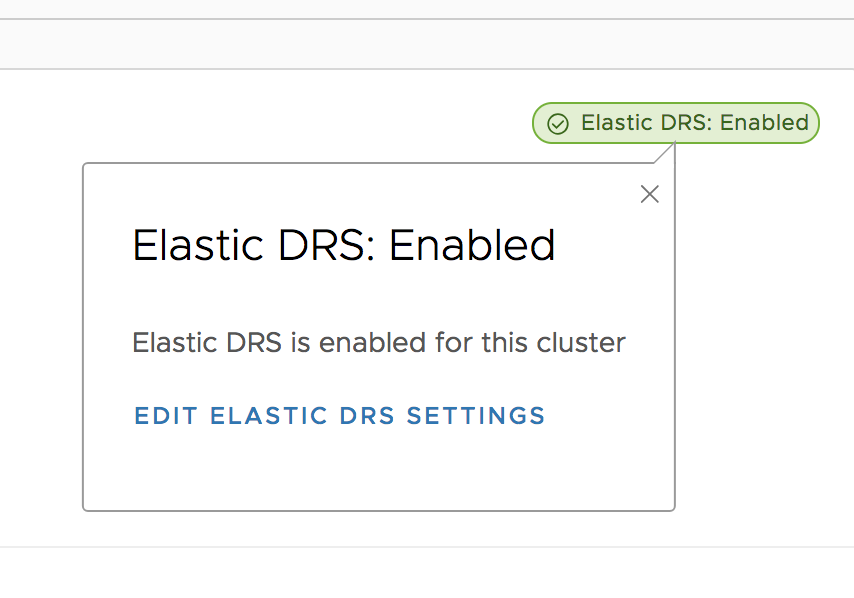
Log into your VMware Cloud on AWS console and select the cluster. A message box will show Elastic DRS is enabled on the cluster.
To further fine-tune Elastic DRS, you have the choice of clicking on the green message box at the top right of your screen or select the option “Edit EDRS settings” in the bottom of your screen.
The next step is to select the Scaling Policy. As mentioned, EDRS provides two scaling policy that optimizes for cost or performance. In this screen, you can fine-tune the behavior of Elastic DRS or disable it if you want to keep the host count of your cluster at a static level.
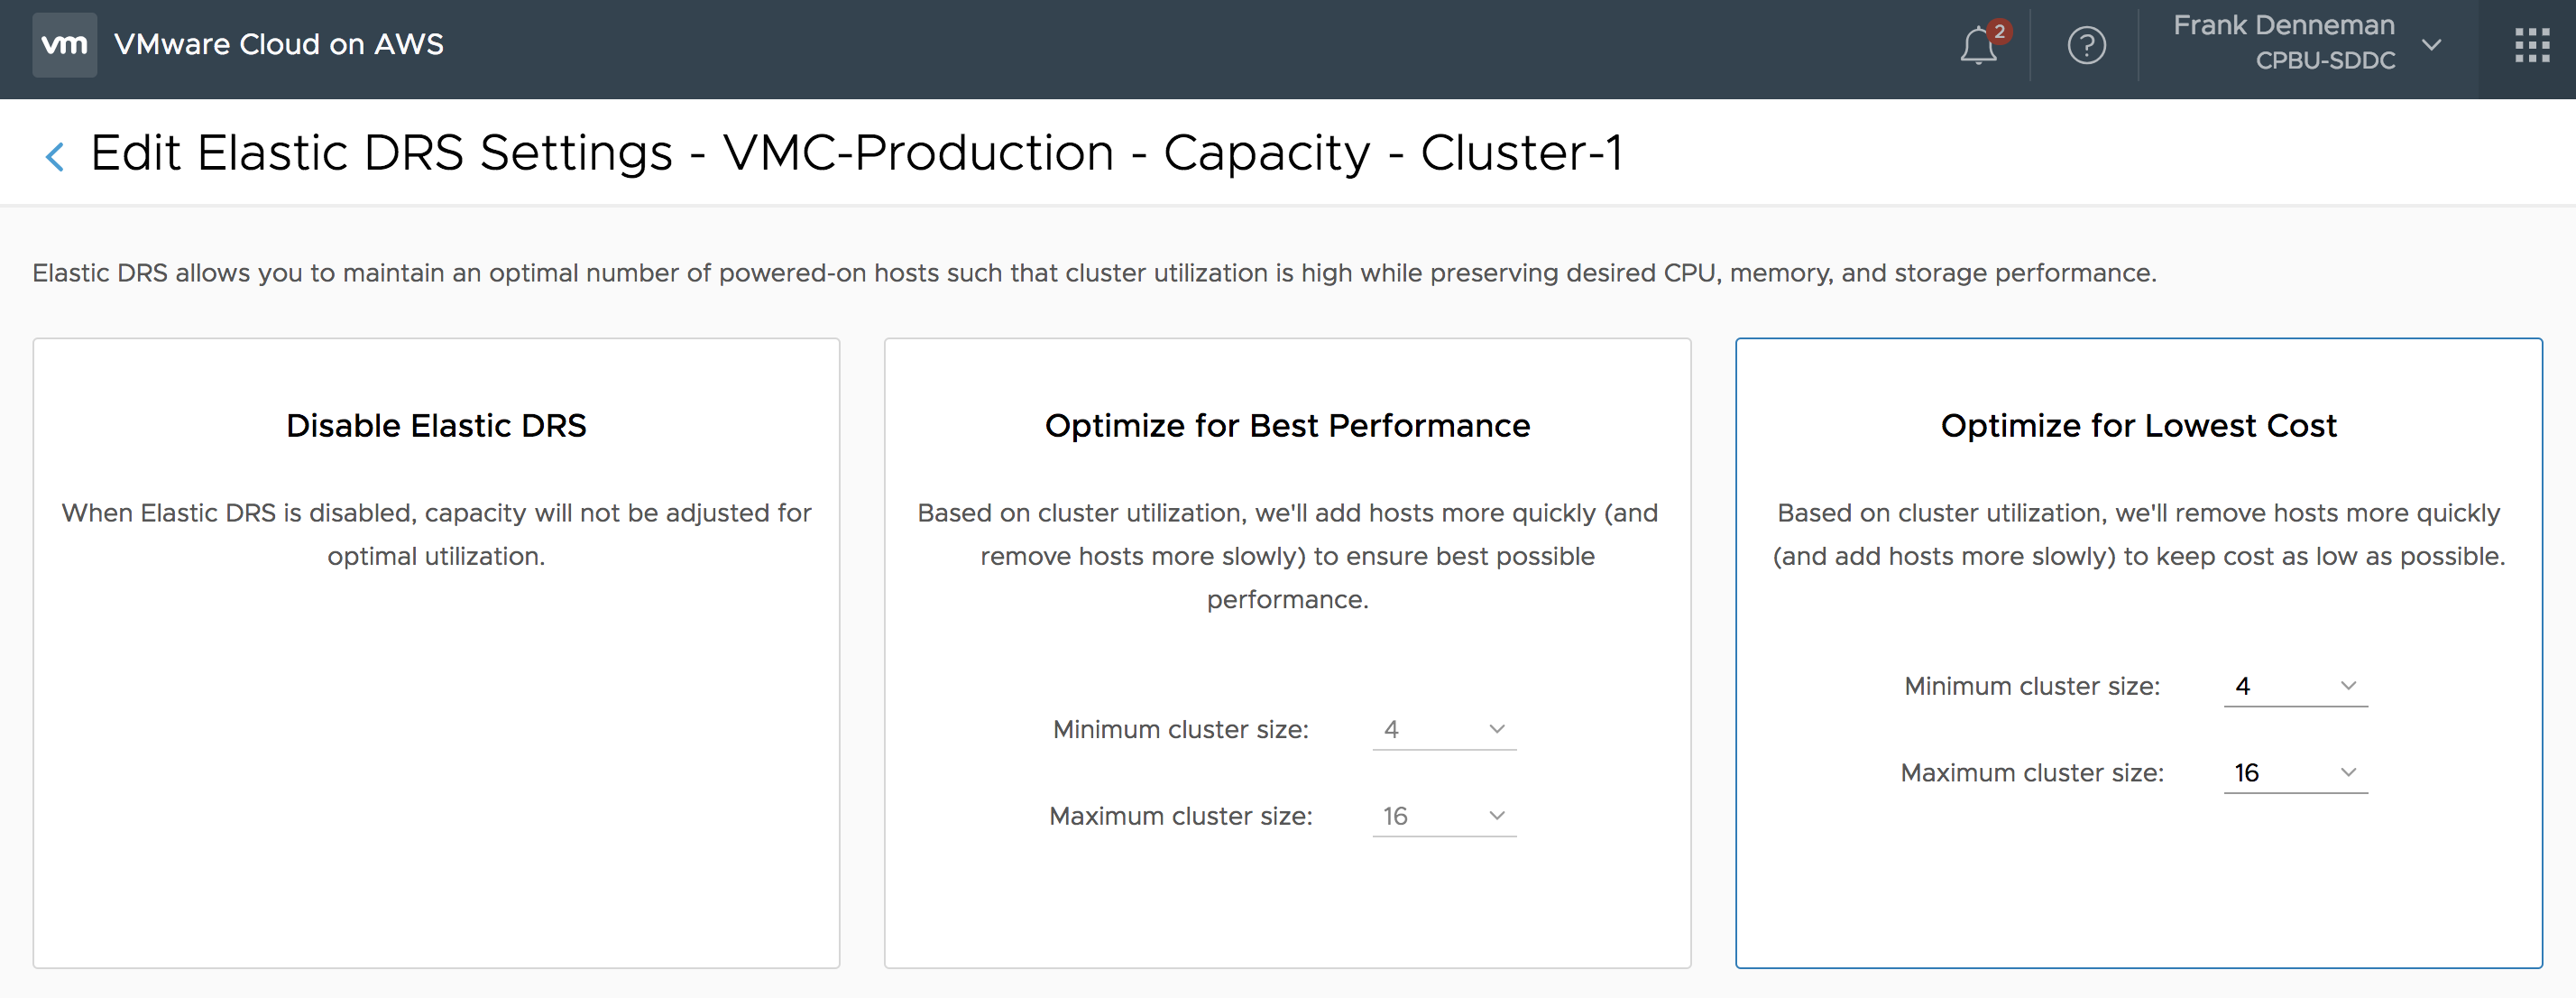
Please note that if you would select the default settings, you give EDRS the permission to scale up to 16 physical ESXi nodes. If this number of ESXi hosts is too high for you, please adjust the maximum cluster size.
EDRS scales up per single node and evaluates the current workload, it uses a time window of 1 hour for evaluation. It does not add multiple hosts at once.
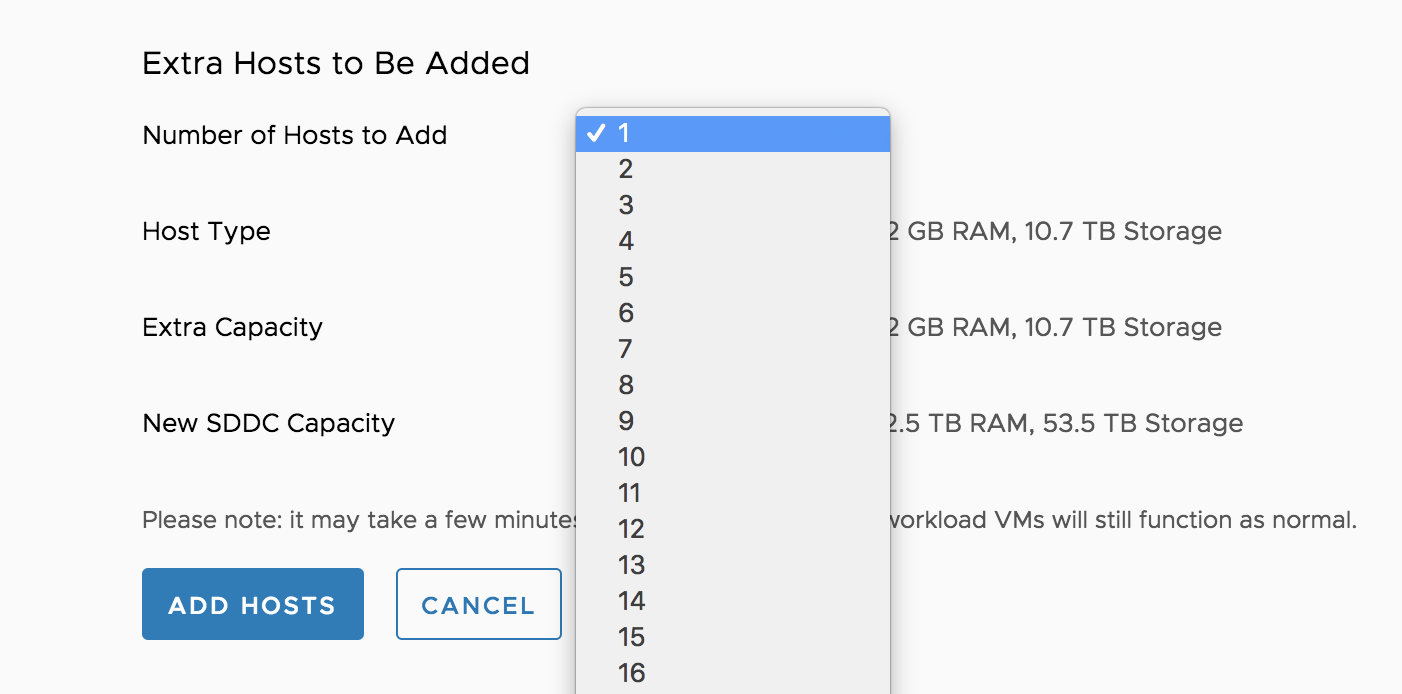
Elastic DRS is designed to adjust to your workload dynamically, it responds to the current demand and scales in and out in a more fluid way. If you are aware of a high volume of incoming workload, you can add multiple hosts to the cluster swiftly by logging into the console, select the cluster to scale out and select add hosts.
You can finetune EDRS by using PowerCLI. Kyle Ruddy will publish an article containing the PowerCLI commands shortly.